To find out that your site has been hacked is a nightmare. Malware on your WordPress site can spell disaster. But don’t panic! This guide provides step-by-step instructions to effectively identify and clean the cyber threat, while also providing strategies for future protection.
If you are in a real hurry, we give you a FREE solution (read below). However, if you have time and some skills, our proven cleanup procedure will assist you in restoring your site to its normal state.
How do I know if my WordPress site has been hacked?
You’ll know your website’s probably been hacked if you notice stuff like:
Your site look has changed without you having done anything.
When browsing your site, you get a warning in your browser or,
Your site has been blacklisted by Google and You see the message “This site may harm your computer”
You can’t log in. Hackers sometimes delete users or change passwords to prevent access. If you’re unable to reset your password, your user account could have been removed. This is a sign of hacking.
Your site is redirecting to another unauthorized site or makes unexpected redirects, This will probably be a site you don’t want your users being taken to.
When inspecting your site files, you identify changes to core system files, plugins, or themes.
If not in a hurry, the following guide offers clear steps to swiftly clean up the infection and protect your site.
Steps to clean your hacked site
Wait! If you can: Restore an old backup.
Before cleaning up malware, think about if you’re okay losing recent content or purchases by restoring an old backup.
The process of cleaning up malware can be challenging because there may be hidden backdoors within your system. These backdoors are secret entry points that malware creators use to regain access even after you’ve removed the initial threat.
The next steps may not cover every aspect of malware infection, but by following it, you should be able to handle many of the typical infections we observe.
1 Backup or clone your current site
During the clean up process you’ll have to take some non reversible actions like upgrades, and reinstalls. Preserve a copy of your current infected site in a staging environment.
Do not break your production site! Staging environments are the solution!
The first step in the cleanup process is to reinstall the WordPress Core files. This process is safe because WordPress Core files should never be modified.
Here you have three options:
Reinstall WordPress with WP-CLI
Best option is to use your terminal and WP-CLI, the command-line interface for WordPress.
# save your WordPress root path in an ENV var:
export WP_PATH=/var/www/html/
cd $WP_PATH
# get the current WP Version:
export WP_VERSION=$(wp core version)
# download WP:
cd /tmp
wp core download --version=$WP_VERSION --path=./
rm -rf $WP_PATH/wp-admin
mv ./wp-admin $WP_PATH
rm -rf $WP_PATH/wp-includes
mv ./wp-includes $WP_PATH
rm ./wp-config*.php
mv -f ./*.php $WP_PATH
IMPORTANT: There are faster methods for reinstallation, but our approach is intentional. The aim behind these commands is to replace all the WordPress core directories, with the goal of removing any potentially hidden files that could be used as backdoors.
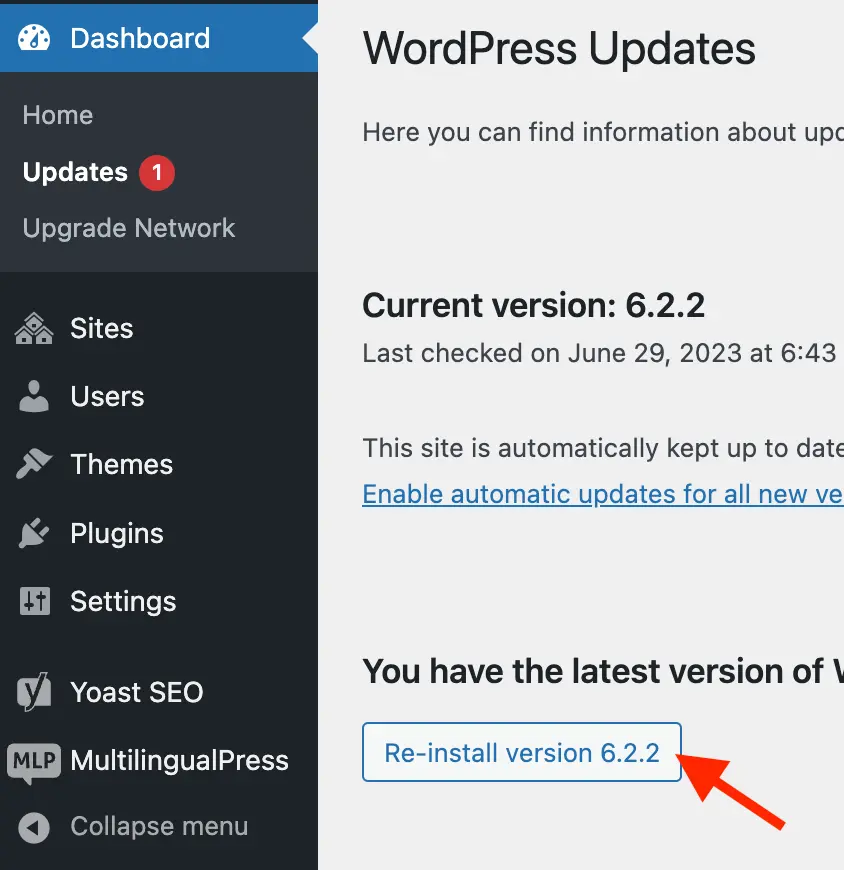
Reinstall WordPress from WP admin panel
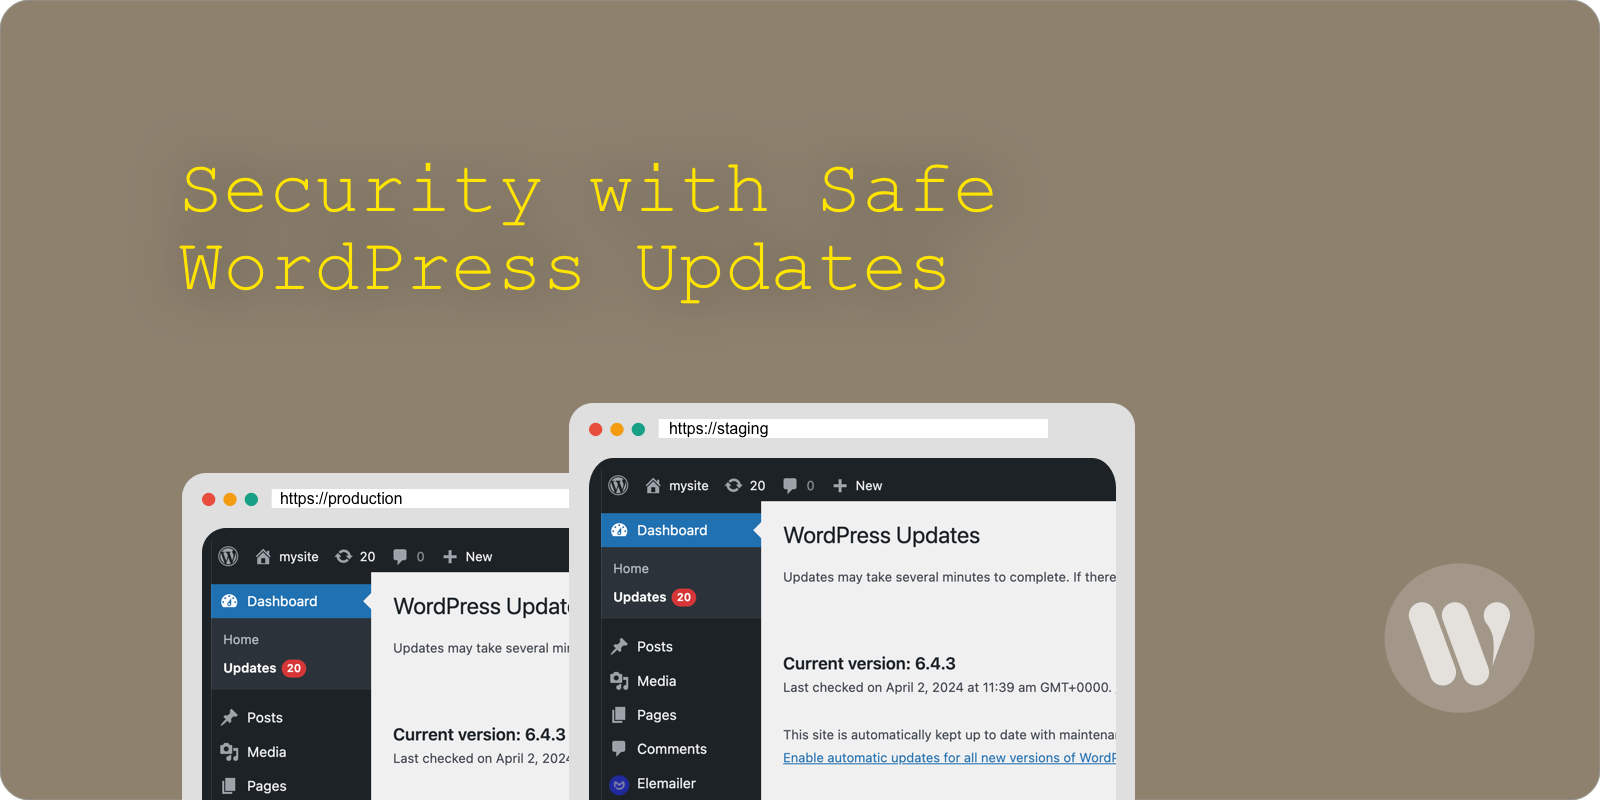
If you don’t have access to the command line, you can login to wp-admin and reinstall it from the WordPress Updates page:
IMPORTANT: While this method replaces all WordPress Core files, it does not remove any potentially hidden files that could serve as backdoors.
3 Inspect The wp-config.php File
After previous WordPress Core replacement, the only php core file that we should have in the WordPress root should be the wp-config.php.
Remove any malicious code from the wp-config.php file. To do this, open the file with an editor and thoroughly inspect it for anything suspicious. If you find anything concerning, remove it accordingly.
4 Reinstall a clean version of your theme
Obtain a clean copy of your theme and use it to overwrite the entire existing directory.
If you have a Child Theme, replace also the entire directory with a clean copy or inspect one by one all the existing files.
5 Remove all non used themes
To avoid potential security holes or hidden files used as backdoors, remove all the themes you are not using.
6 Remove all non necessary plugins
It’s important to eliminate any potential security issues by deleting unused plugins.
It’s also time to individually inspect any unusual plugins you didn’t install yourself or any plugins that aren’t available in official repositories.
7 Reinstall plugins
You should reinstall as many plugins as possible.
During this stage, maintaining the same versions is essential to prevent any disruptions.
Yes!!, we recommend updating your plugins later on, but only after your site has been cleaned, a backup has been created, and your malware celan-up work is secured.
# save your WordPress root path in an ENV var:
export WP_PATH=/var/www/html/
cd $WP_PATH

# get commands to update plugins preserving versions:
wp plugin list --fields=name,version --skip-update-check --format=csv | \
awk -F"," 'NR>1 {print "wp plugin install " $1 " --force --version=" $2}'
This will output a command list to help you reinstall:
Execute each ‘wp plugin install‘ command one at a time, being vigilant for any potential errors. A warning alert related to file writing or replacement issues could indicate a compromised or infected plugin. If necessary, remove the entire plugin directory and re-run the command until it executes without errors.
8 Inspect the mu-plugins dir
If a ‘mu-plugins‘ directory exists, manually inspect every installed plugin within it. This is one of the common locations where malware can hide.
In WordPress, the “mu-plugins” (Must Use) directory houses plugins that are automatically activated for all sites in an installation. These plugins load before others and can’t be deactivated from the admin panel.
9 Scan the WordPress file system
By now, your WordPress site should be nearly clean. It’s time to carry out a thorough scan of every file within your WordPress file system.
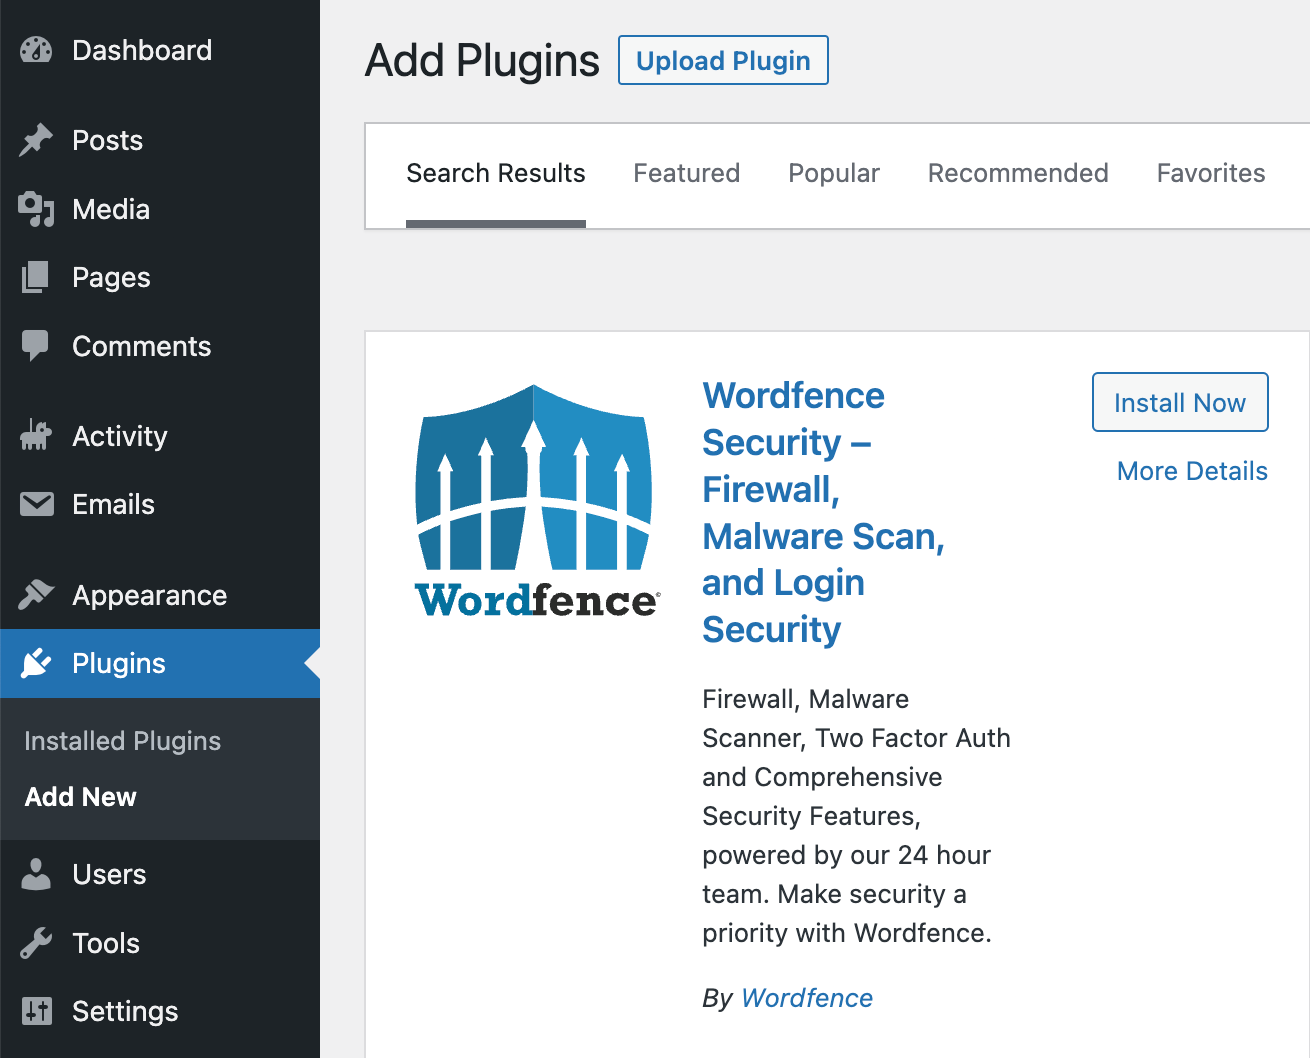
For the malware scan, at Wetopi we recommend the plugin WordFence. Install it:
Then lets configure the scan options for a deep inspection. Jump WordFence “Scan” section, then press the link “Scan Options and Scheduling”:
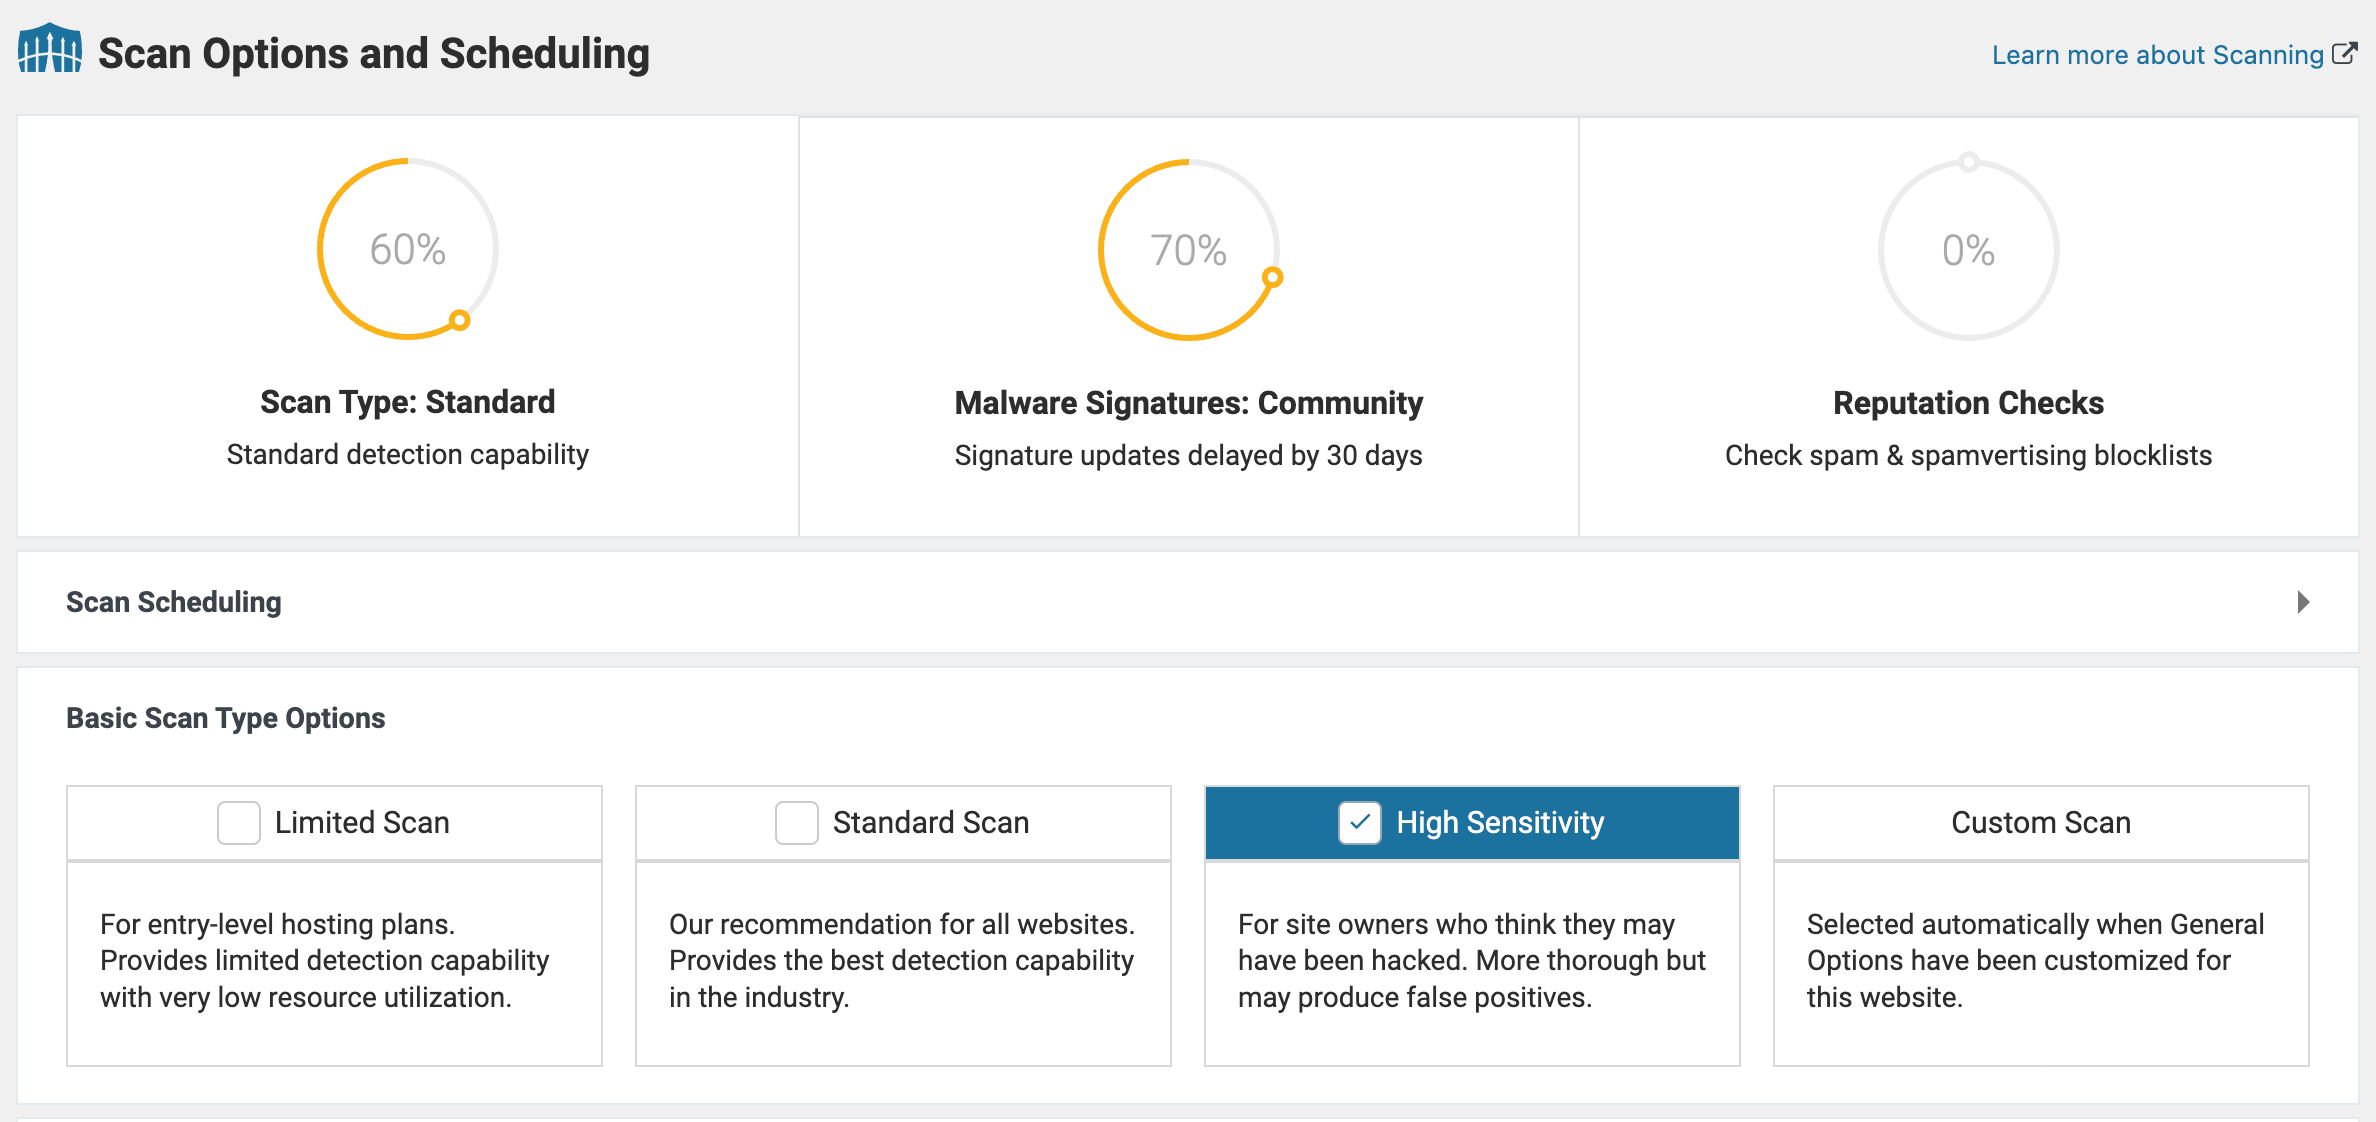
Navigate to the “Scan Options and Scheduling” page.
Under the “Basic Scan Type Options” section, select the “High Sensitivity” option.
After making this selection, click “SAVE CHANGES”, located at the top right of the page.
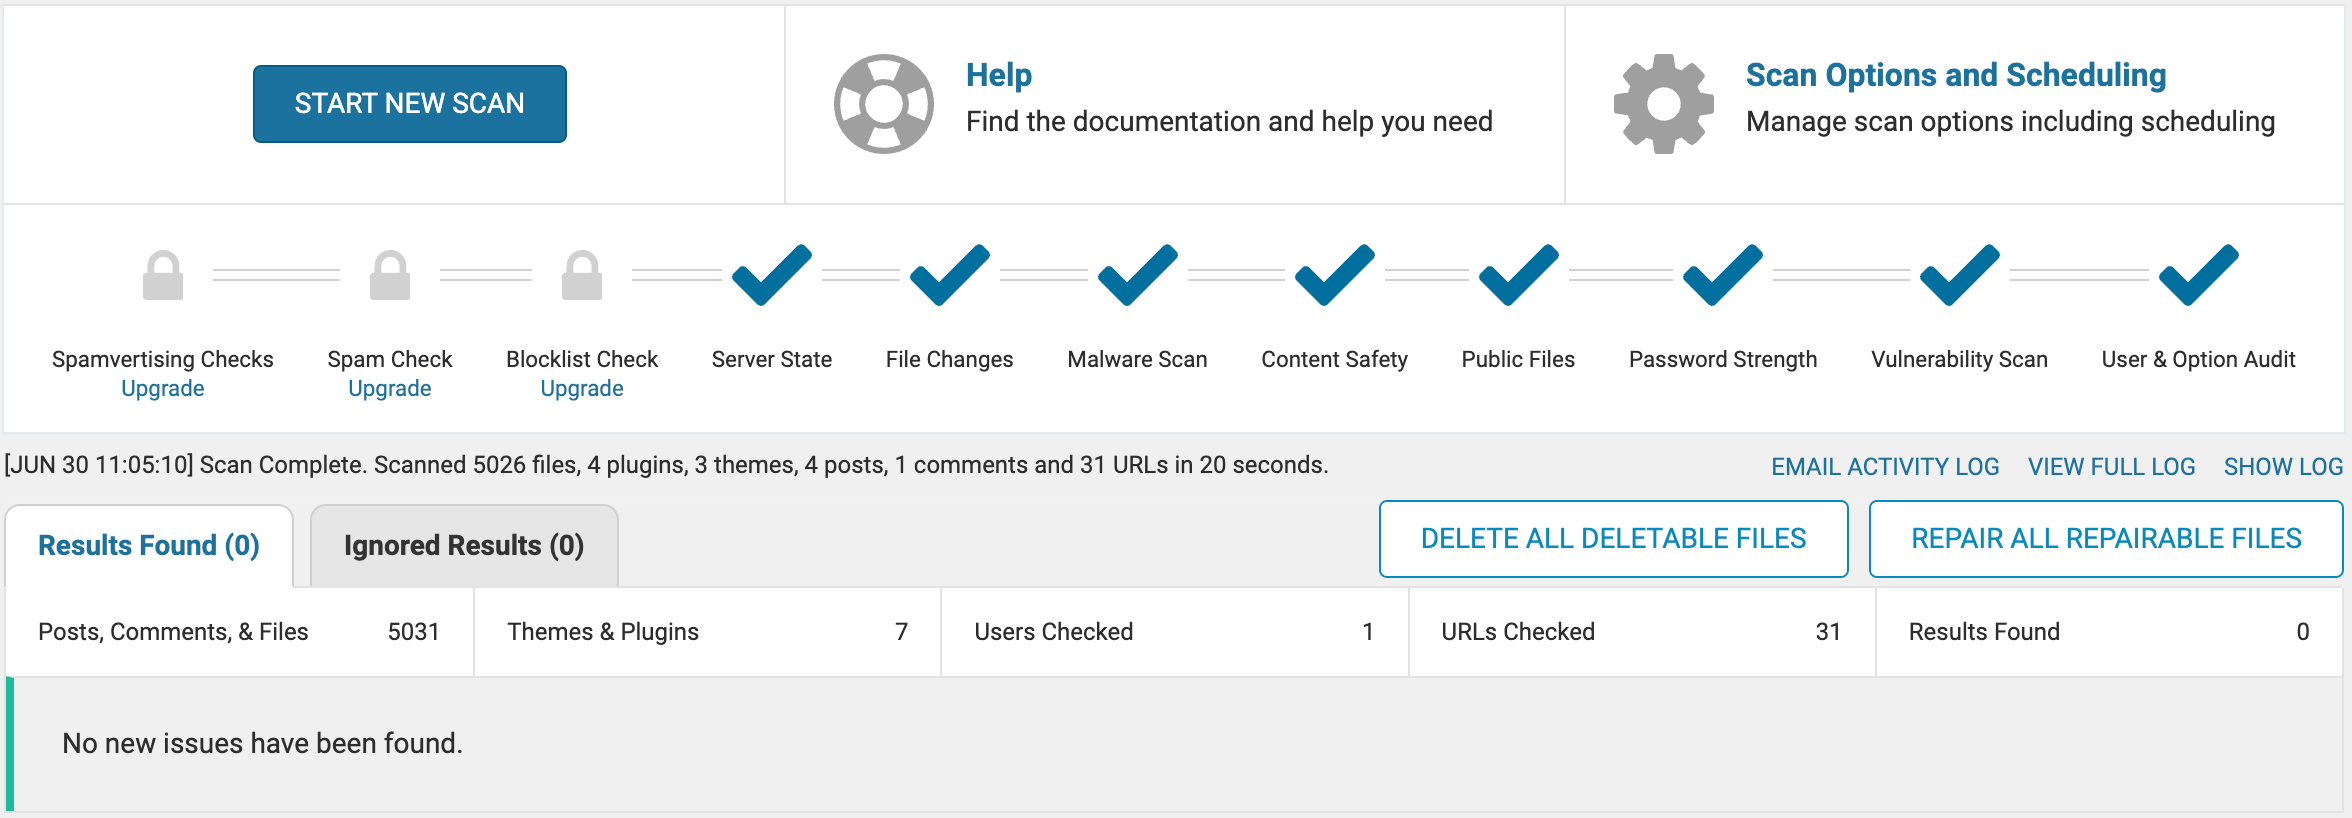
Finally, return to the main “Scan” section and click the “START NEW SCAN” button.
WordFence will take some time to perform the scan, and a list of potential issues will appear below during this process. For more details on how to interpret these results, refer to the official plugin page titled “Working With Scan Results“.
In short, your goal is to clean all the problems found in “Results Found” tab. Then “scan”START NEW SCAN” again until you get the “Results found (0)”.
10 Manually scan the WordPress file system
If you have identified the time of the intrusion from a previous scan, you should seek out files that were modified during that time. You have several commands to assist you:
# find files with content modified between 2023-06-07 and 2023-06-01:
find /var/www/html -type f -newermt "2023-06-07" ! -newermt "2023-06-01" | xargs ls -l

# find files with inode data change time older than 720 days:
find /var/www/html -type f -ctime +720

# find files with content modified in the last 15 days:
find /var/www/html -type f -mtime -15

# find files modification time older than 720 days:
find /var/www/html -type f -ctime +720

# delete files with content modification time older than 720 days:
find /var/www/html -type f -mtime +720 -exec rm {} \;

# sort files by date
find /var/www/html -type f -printf '%TY-%Tm-%Td %TT %p\n' | sort
If your previous scans revealed a “pattern” or traces of “malicious code,” it’s suggested to run a second scan. The following commands can help you in this process:
# search text 'the_malicious_code' inside files:
grep -r --include "*.php" 'the_malicious_code' /var/www/html/

# search for malicious evals:
grep -r --include "*.php" -E "^[^/]*[^(double)]eval\(([^)]+)\)" /var/www/html/

# combined find and grep using a file with a list of patterns:
cat <<EOF > patterns.txt
eval\(
exec\(
gzinflate\(
base64_decode\(
str_rot13\(
gzuncompress\(
rawurldecode\(
strrev\(
ini_set\(
chr\(
rand\(
shell_exec\(
fopen\(
curl_exec\(
popen\(
EOF

find /var/www/html/ -type f -mtime -7 -exec egrep -Hno -f patterns.txt {} \;
11 Remove any users you do not recognize
Minimize the number of accounts across all your systems, such as SSH, SFTP, Database, and WordPress, to the bare minimum. For WordPress, pay extra attention to “Admin” users and only retain those that are absolutely necessary.
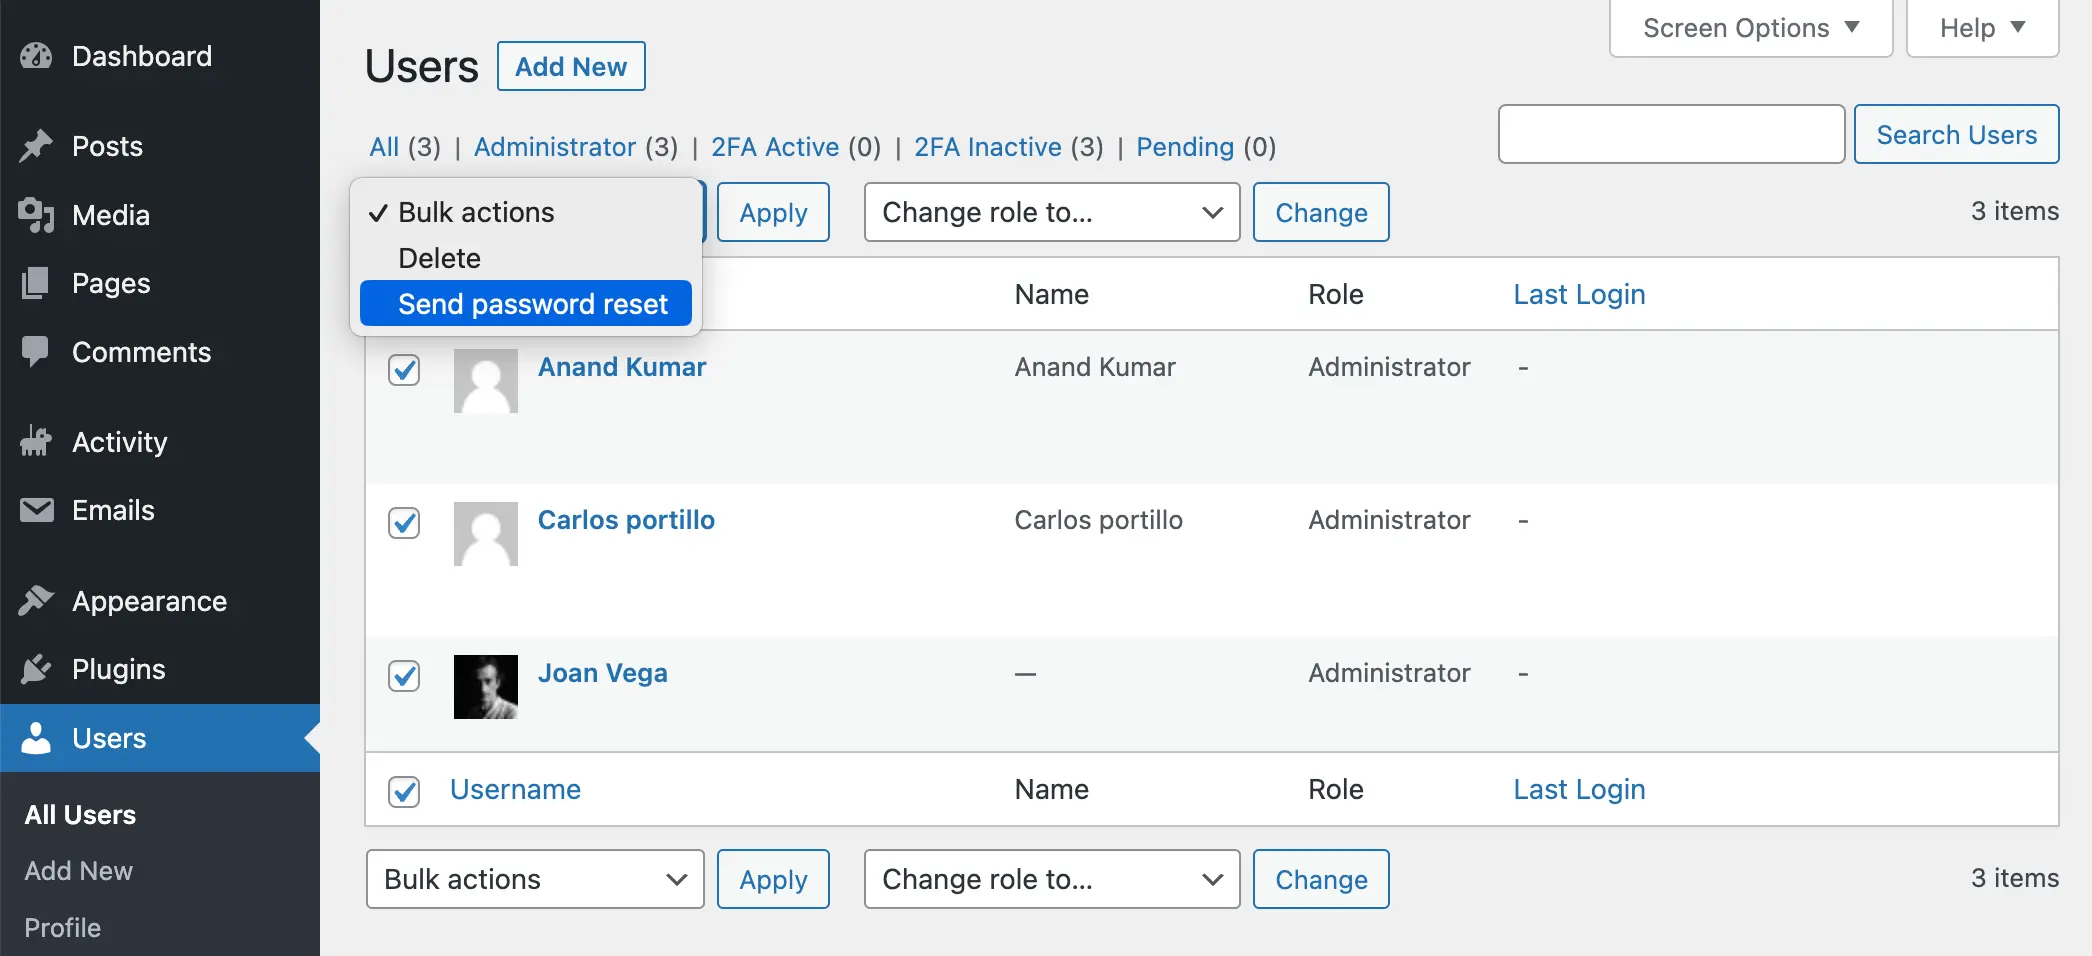
12 Change all WordPress User Passwords
After removing all non-essential users, enforce a password reset for each of them.
You can change all user passwords at once by using the, Bulk action, “Send password reset” feature on the WordPress User list page.
IMPORTANT: Please note that this action won’t directly change the passwords, nor will it force users to do so. This bulk action sends an email with a reset password link to each user. Therefore, be sure to inform all your users to check their email for the password reset link.
At this stage, your site should be clear of malware.
However,
⚠️ don’t stop now
– your site remains vulnerable.
Protect your WordPress site from being Hacked
After a malware intrusion, you are the target of bots trying to regain access to the vulnerabilities of your site. They know your previous vulnerabilities and will try again and again. It’s time to close the open doors.
1 Make a backup of your clean site
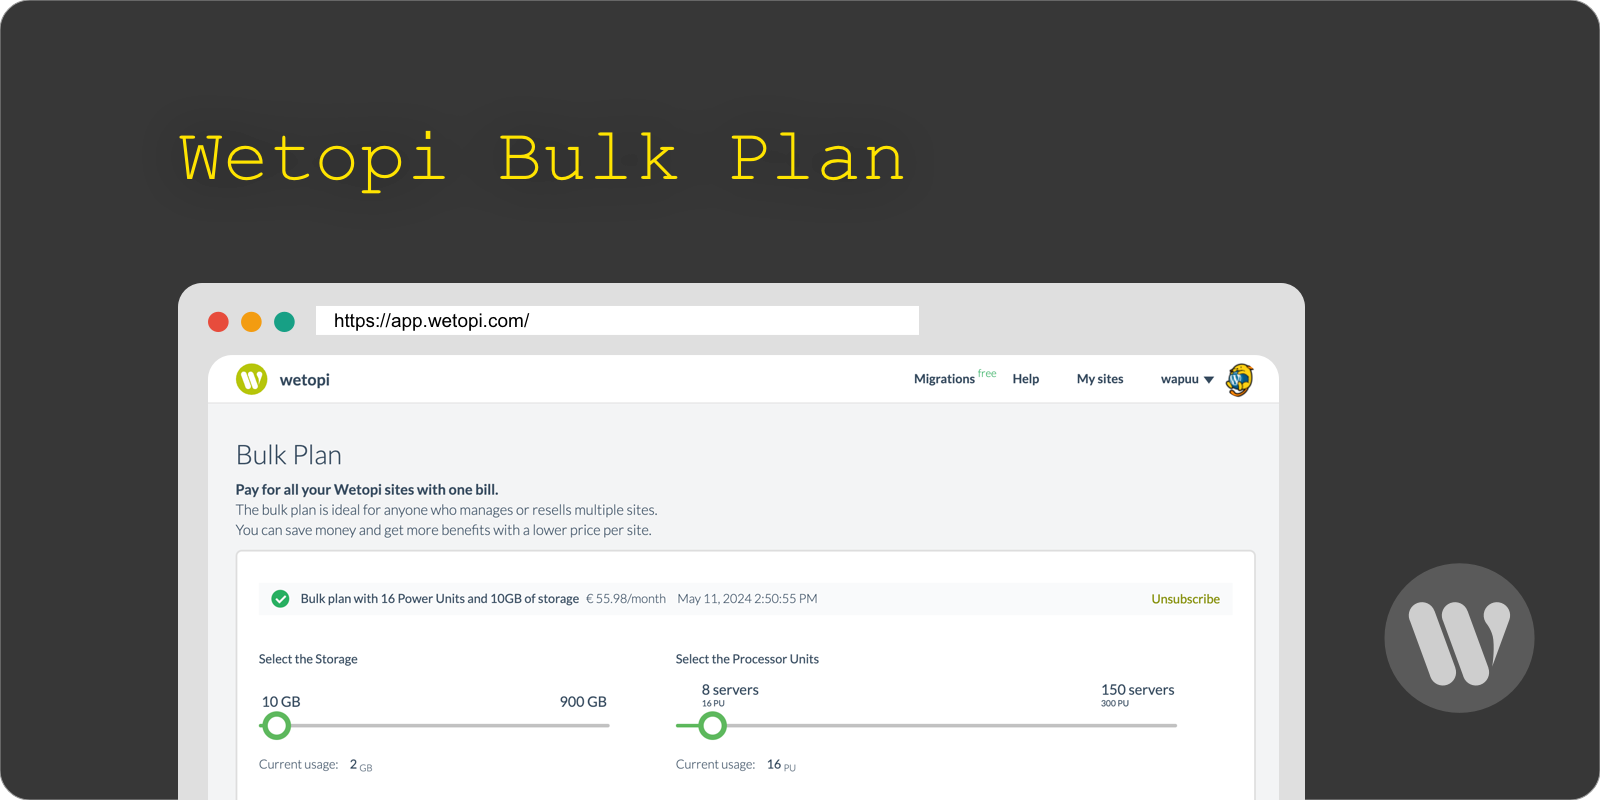
Once you are confident that your site is clean, create a backup immediately. You can do this from the Wetopi panel with a single mouse click.
Moving forward, tasks such as upgrading plugins or themes might disrupt the look and feel or functionality of your site. Therefore, having a backup for a potential rollback is vital. A more prudent strategy is to set up a staging environment – a safe clone of your site where you can conduct tests before deploying changes to your live WordPress site.
Do not break your production site! Staging environments are the solution!
While it’s crucial to recover from malware intrusions as quickly as possible during the cleanup process, we don’t recommend upgrading at this stage. Now, once you’re in a safe staging environment and have more flexibility, it becomes essential to upgrade to the latest versions. If not the latest versions, then at least the latest releases that include security fixes.
Follow this order and make updates, one at a time:
Update plugins
Update themes
Update WordPress core
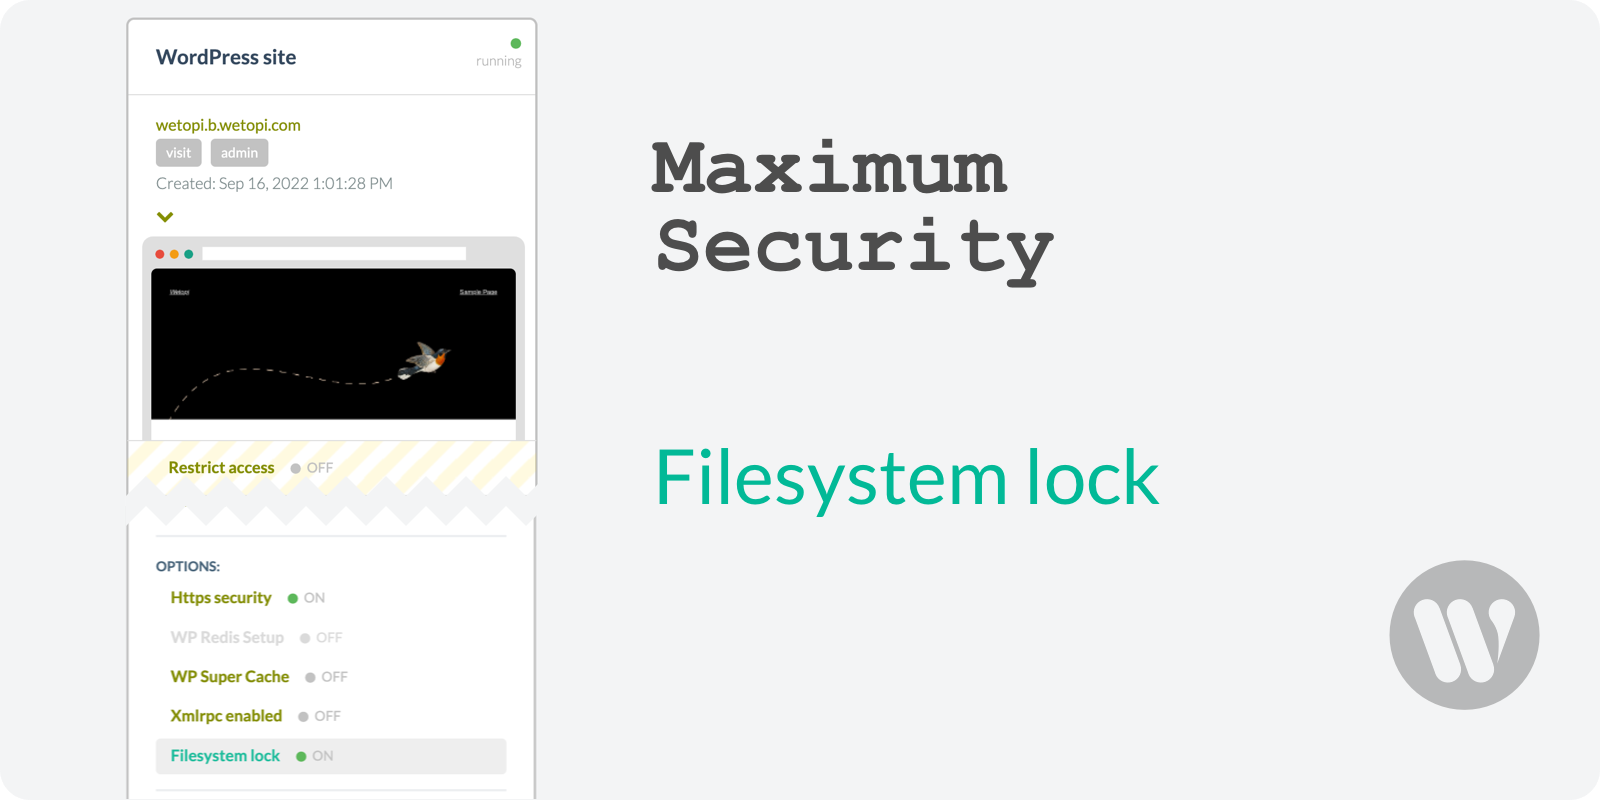
3 Block your WordPress filesystem
If, for any reason, you were unable to upgrade your WordPress code in the previous step to close all security vulnerabilities, we strongly recommend removing the write permissions of your site.
By blocking the WordPress filesystem through File Permissions, you can enhance the security of your WordPress installation.
The concept behind this is to examine the traffic requests associated with previous files of malicious code.
This is an extra precaution that we, at Wetopi, take to safeguard your site and the sites of all our platform customers.
5 Your Credentials May Have Been Compromised
One final tip for your future protection.
Websites can be hacked if your login details are compromised or leaked from breaches on other sites. Since we often use the same login information across multiple websites out of habit, it’s crucial to check if your login credentials have ever been compromised in known public breaches.
Check if known public breaches have ever compromised your login credentials at https://haveibeenpwned.com.
Have I Been Pawned was created in 2013 by Troy Hunt, a security expert, to provide the general public a means to check if their private information has been leaked or compromised?
What if my site is Hacked while hosting with Wetopi?s
In the rare event of a site getting hacked at Wetopi, our team of WordPress experts will quickly and carefully remove the malware for you at no cost for Medium or higher size servers.
If you are a Wetopi client, this is included in your plan: