This guide explains how to establish an SSH (Secure Shell) connection to access the command line of your server. While we’ll be using our WordPress Wetopi hosting service as an example, the same procedure applies to any other situation. Keep reading!
What is SSH and what is it for?
Before delving into details, it’s important to know that SSH enables you to administer a server remotely and securely, without exposing your credentials or the data transferred between the client (e.g., your laptop) and the server.
Enhancing WordPress development with SSH access
Remote access via SSH (Secure Shell) allows you to access the command line of your server. As a WordPress developer, using the command line enables you to work more efficiently on tasks such as:
- Moving files and directories.
- Compressing and decompressing zip, tar, and other files.
- Using the command line interface for WordPress, WP-CLI.
- Working with development tools like Git or Composer.
At Wetopi, we provide remote access via SSH to all users with “Professional” or “Agency” profiles.
How to connect via SSH
1. Create an SSH client for remote access.
Depending on the operating system you’re using, you may need to install an SSH client that allows you to remotely access your server.
For Windows users, an SSH client isn’t included by default. Thus, you’ll need to download and install an external one like Putty.
Conversely, both Mac and Linux come equipped with a built-in tool that allows SSH access from the terminal without the need for additional software.
2. Access data for SSH connection
The basic data to establish a connection via SSH is:
- Host (Server): e.g.
ssh.c.wetopi.com - Port: by default port 21 is used. But in Wetopi we use dedicated ports, e.g.:
22022 - User: e.g. we use the user
www - Password: in Wetopi by default you can access with a password, although later we will show you how to connect using keys.
If you’re a Wetopi user, you will find all this data in the advanced options menu of your server:

3. Initiate SSH connection
Using the connection data provided above, you can populate the fields in the Putty client or a similar program. Alternatively, if you have a terminal, open a window and run the SSH application, passing the User, Host, and Port information as shown in this example:
ssh www@ssh.c.wetopi.com -p 22022When trying to connect using a password, SSH will tell you that “Host authenticity cannot be verified using keys”, so it will then ask for a password.
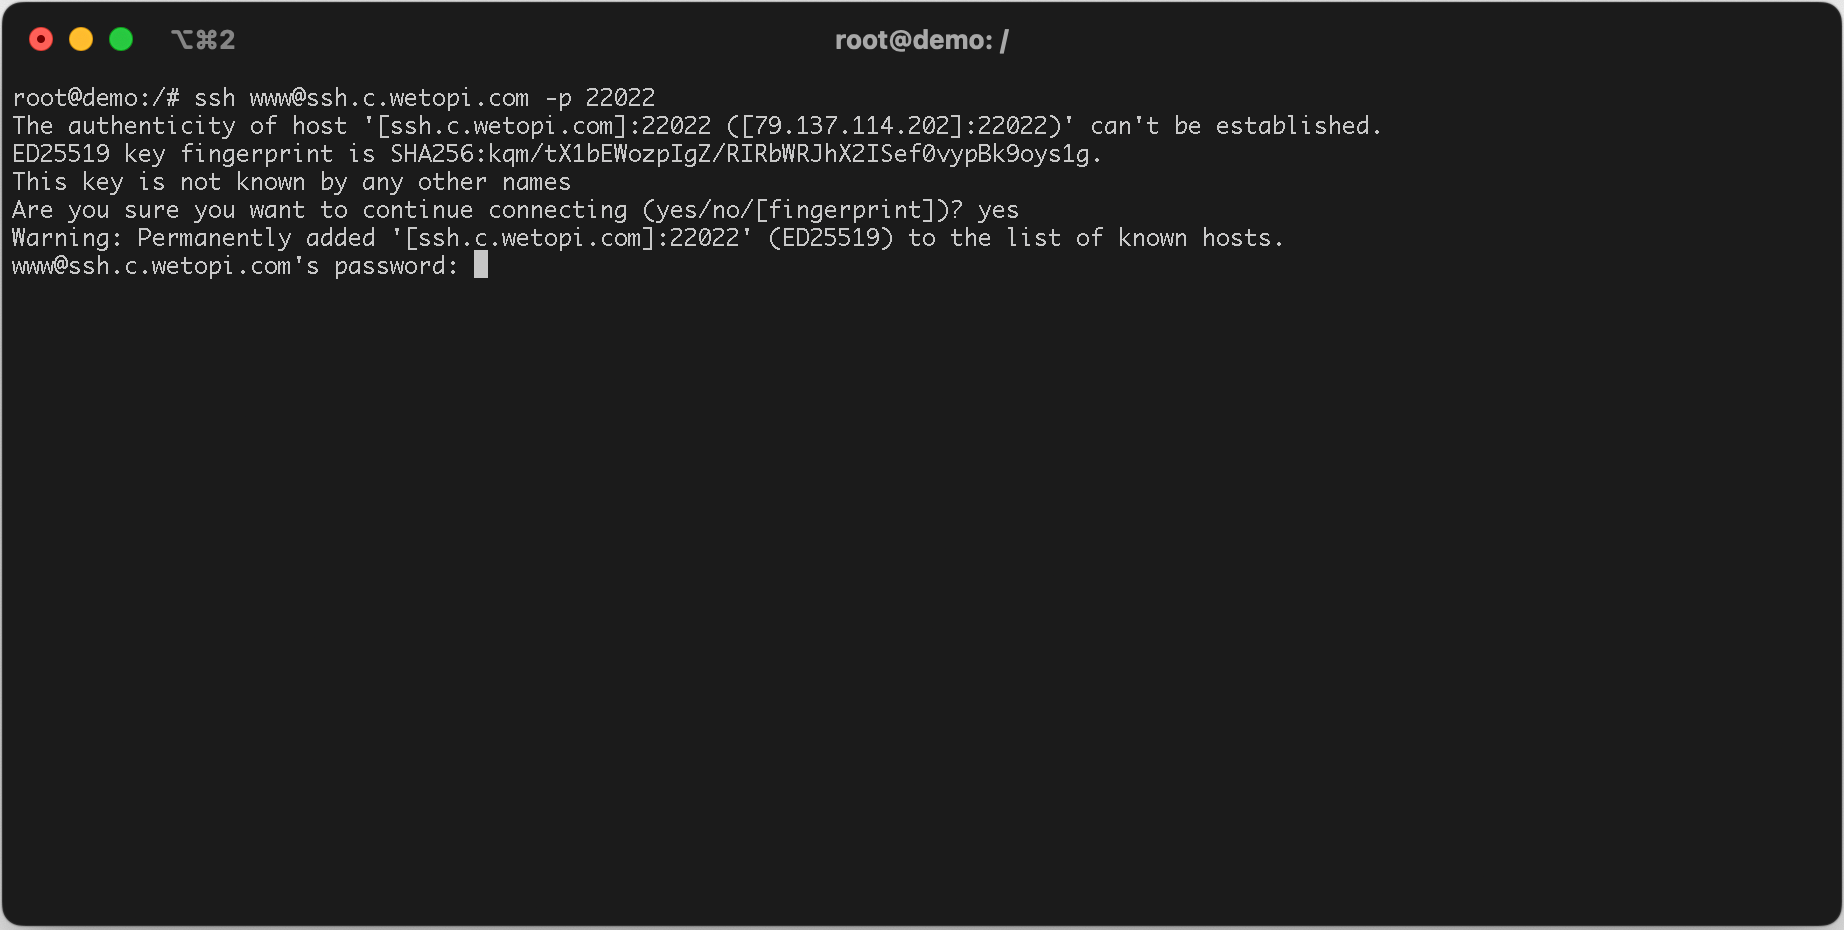
Also, if it is the first time we connect, the host is unknown and it will ask us to confirm if we want to proceed:
This key is not known by any other names Are you sure you want to continue connecting (yes/no/[fingerprint])?We select ‘yes’, and then it will prompt us for the password. Upon entering it, we will be immediately connected remotely to the server .
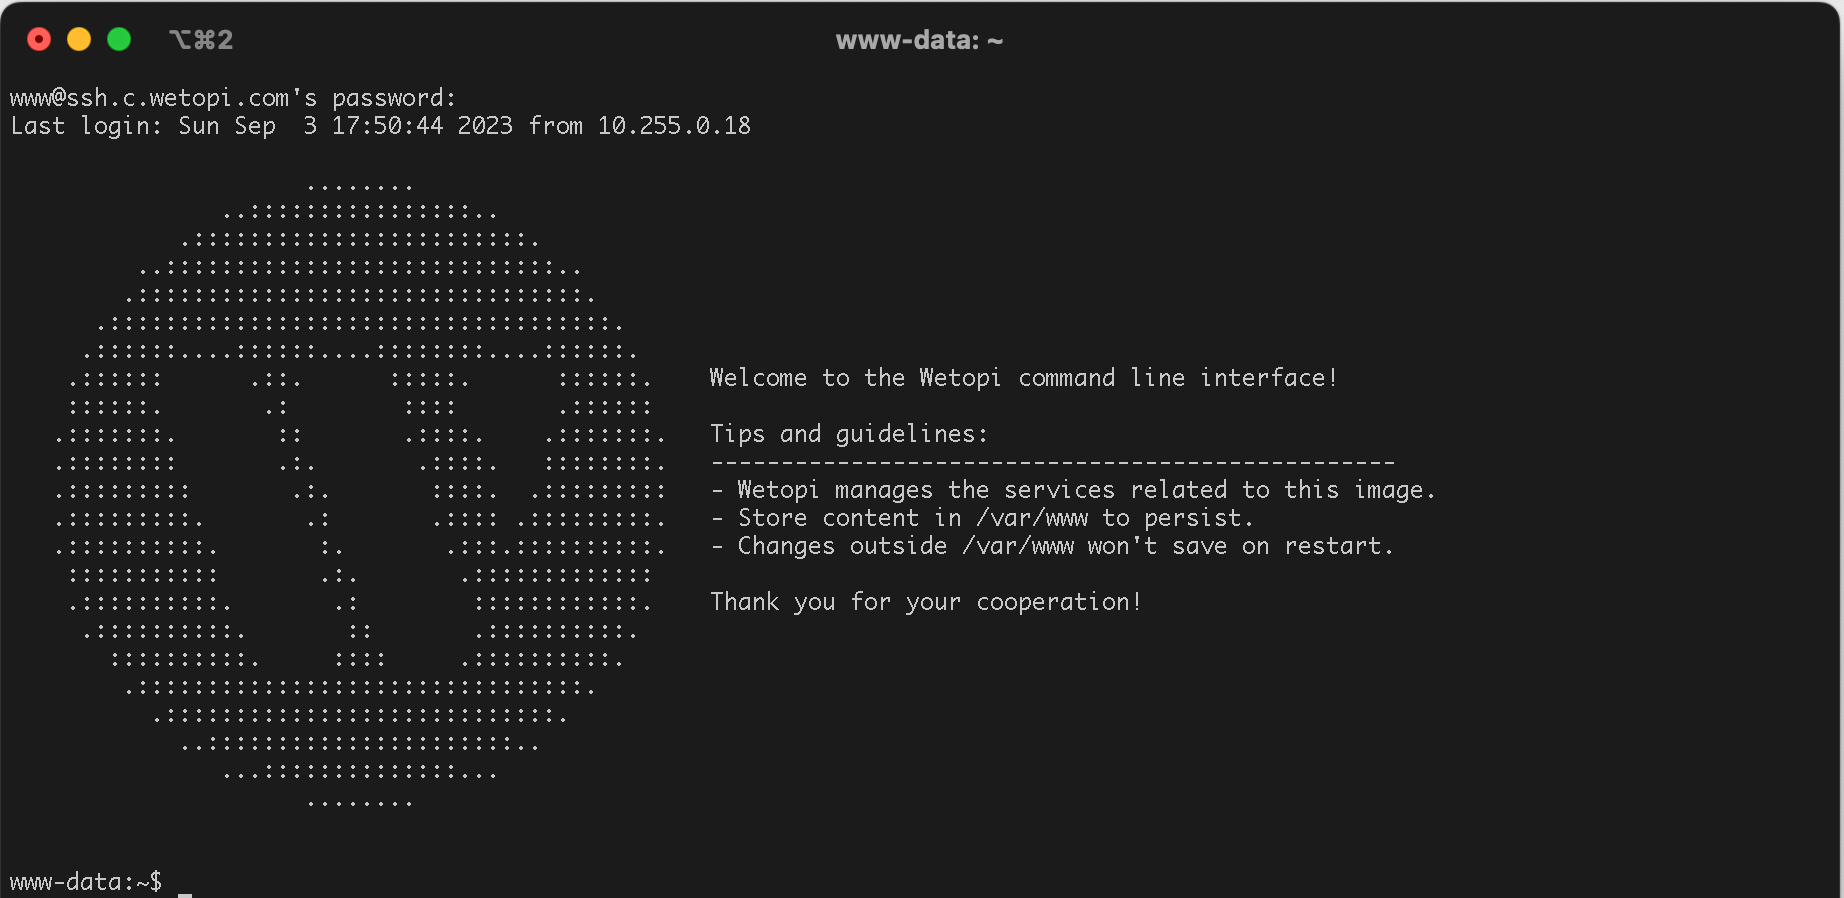
Once you’re in the command line, the content and commands available to you will be determined by your user profile. In Wetopi, the SSH user ‘www’ has the same privileges as the web user ‘www-data’. This arrangement ensures that any management tasks you perform on the WordPress file system won’t alter privileges, potentially causing issues.
In Wetopi, by default, tools such as WP-CLI are instantly available, allowing you to carry out WordPress maintenance and management tasks
Connect via SSH with Private Key
SSH keys enable connections between two hosts without passwords, utilizing a pair of keys: one public and one private.
Continue reading to learn the step-by-step process of generating and using keys for SSH connections.
1. Prepare your server to manage SSH keys
(Note: If you are working with a Wetopi server, you can skip this step. Otherwise, continue reading.)
To work with SSH keys, you must first create the hidden .ssh folder in the home directory of your user account on the remote server using the following command
mkdir -p ~/.sshThen, restrict the permissions of that directory to ensure the keys are secure:
chmod 700 ~/.ssh2. Use OpenSSH to generate the keys
For enhanced security, always generate your key pair on your local computer rather than on the server.
For Windows users, while you can generate keys on the server, it’s imperative to copy your keys to your laptop and then remove the private key from the server after its creation.
Both Mac and Linux systems come equipped with the ssh-keygen command from OpenSSH, which is designed for generating key pairs.
ssh-keygen -t rsa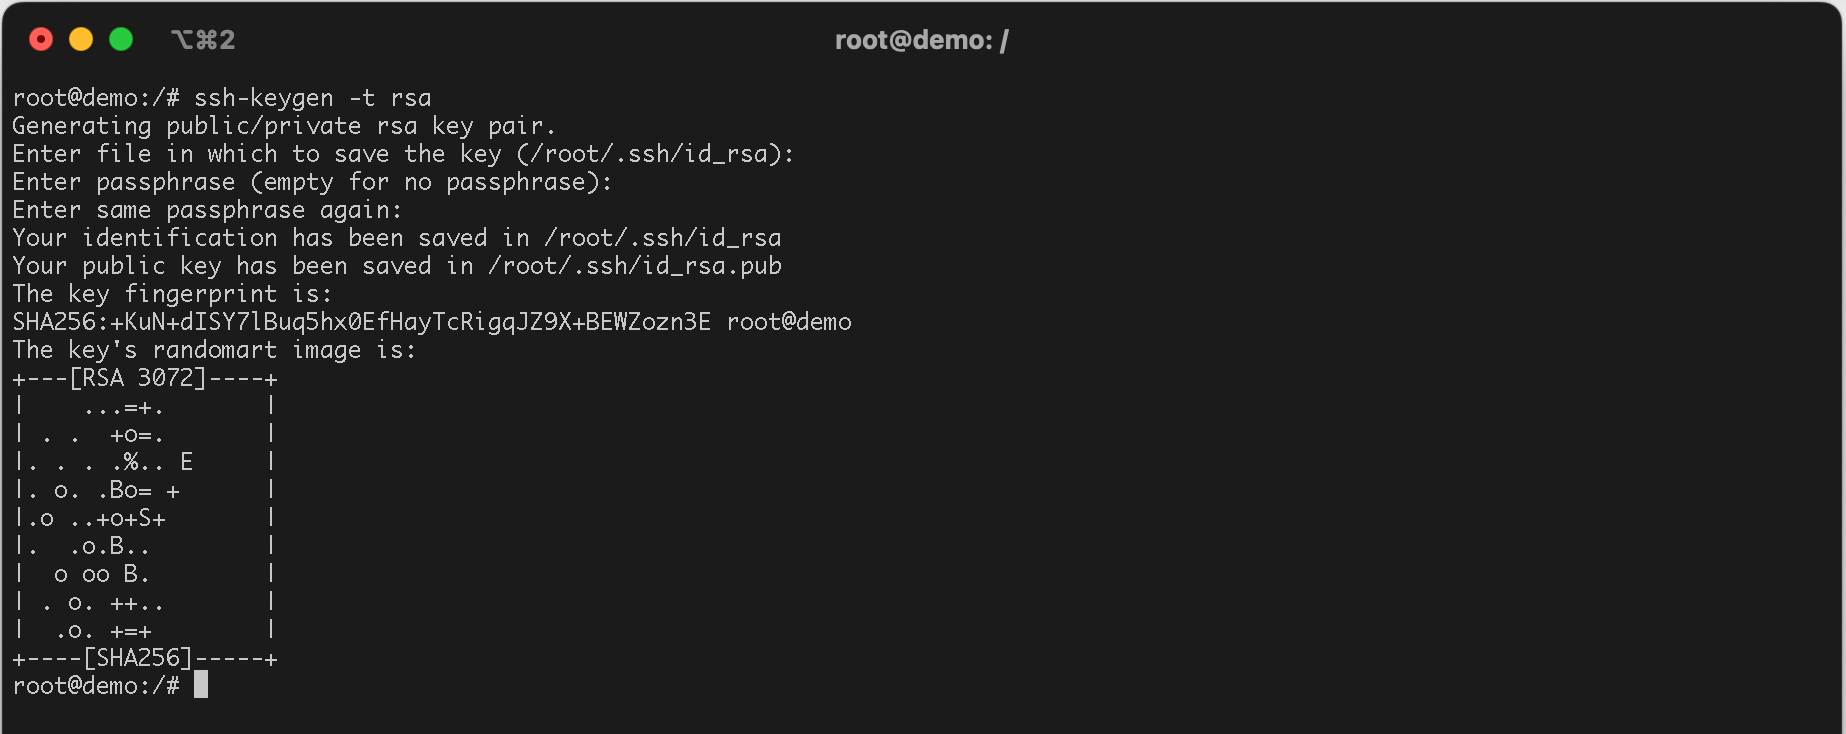
ou will be prompted to select a location to save the keys. The default location, typically your home directory, is recommended. Simply press “Enter” to choose this default location.
Next, you’ll be asked for a passphrase. This step is optional; if you prefer not to set one, just press “Enter”. Following this, you’ll see a fingerprint and a “visual fingerprint” of your key. There’s no need to record this information.
Upon completion, both the private and public keys will be saved in the .ssh directory.
3. Save a copy of the public key on your remote server
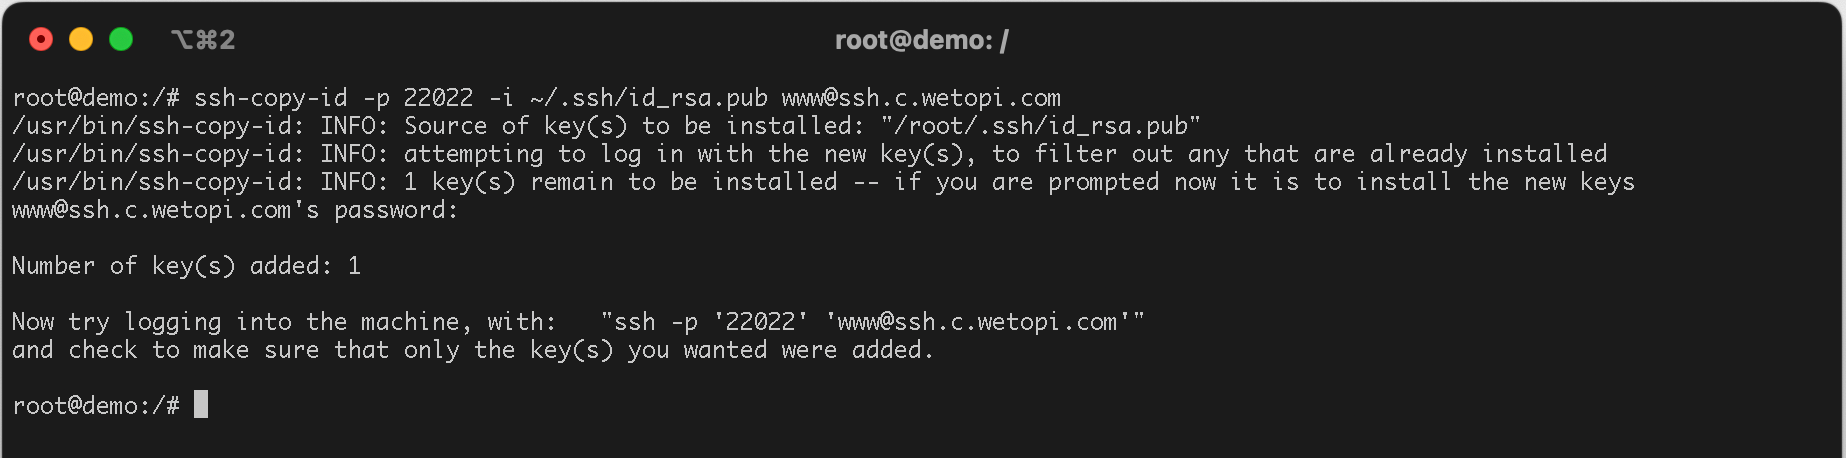
To transfer the public key, you can utilize the ssh-copy-id command, specifying the appropriate port, user, and host. Continuing with our example:
ssh-copy-id -p 22022 -i ~/.ssh/id_rsa.pub www@ssh.c.wetopi.comThis process assumes you’ve saved your key pair using the default name and location. If you chose a different name or location, replace the key path ~/.ssh/id_rsa.pub with the path to your specific key.
When prompted, enter the password associated with your user account on the SSH server.
You can now connect to your server using the key pair. In our example, it won’t prompt you for a password:

Conclusion
Perfect! You’ve learned how to connect via SSH.
Using SSH is a fundamental skill for secure server management. By understanding key generation and server setup, you can enhance the security and efficiency of your operations.
As you continue to work with SSH, remember to refer back to this guide and seek help when needed. Proper server management is crucial for maintaining a safe online environment.
if you have any further questions, please contact us. We’ll be glad to assit.
Don’t you have an account on Wetopi?
Free full performance servers for your development and test.
No credit card required.
This might also interest you: