This post will walk you through setting up a WordPress Multisite with subdomains so you can manage multiple sites under different subdomains. e.g. support.mysite.com blog.mysite.com
Setting up WordPress Multisite with subdomains in just four steps
Still haven’t made the decision to utilize subdirectories, subdomains or even multisite? Take a look at this compendium of Conditionals and a list of Good and Bad Parts, to definitively help you to decide.
Hands-on!
1 Starting from a standard WordPress site
WARNING: do not experiment with your production site! period. Backup, or even better work with a clone, or simply start a clean WordPress. Both options just take a few seconds with Wetopi (watch this 20sec video Stop breaking your live WordPress).
If your hosting does not provide staging,
invest 10 secs!
Sign up and get your free development server.
Once our standard WordPress site is up and running, we are ready to enable the WordPress Multisite with subdomains mode.
2 Enabling Multisite mode
To do this, you need to modify the WordPress configuration: wp-config.php
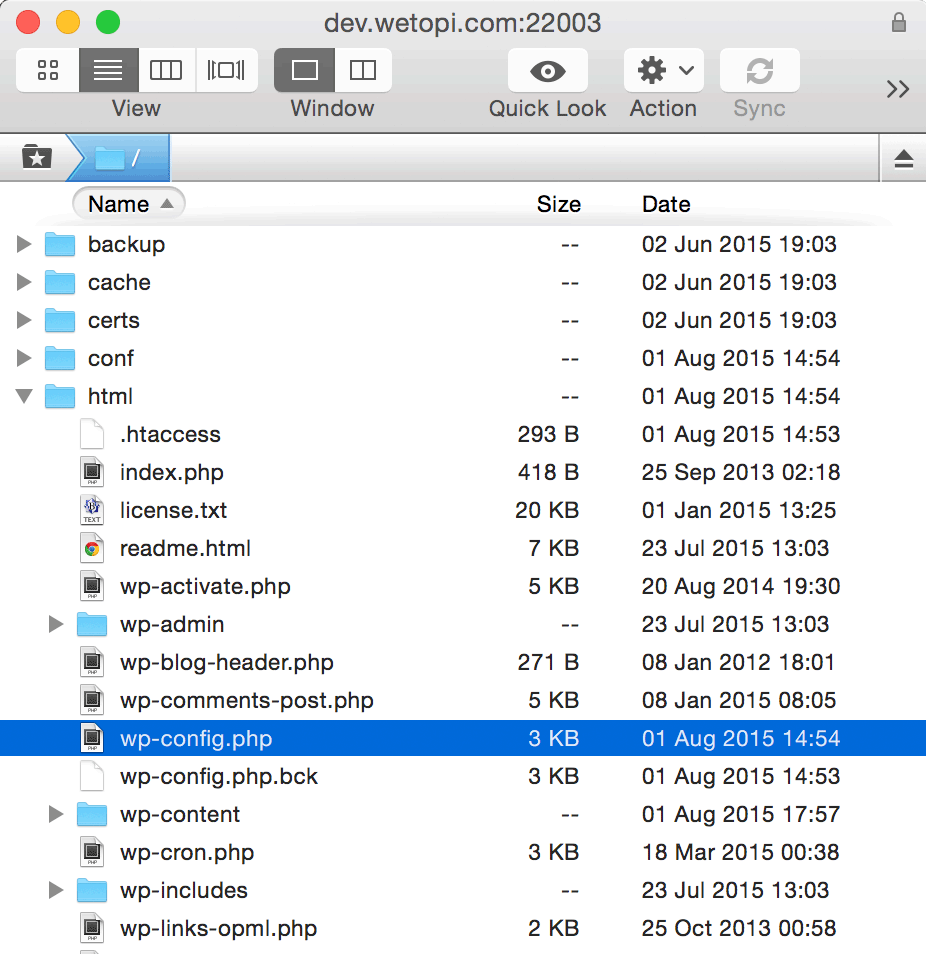
Log into your server using an ftp client and open the wp-config.php with your favorite text editor.
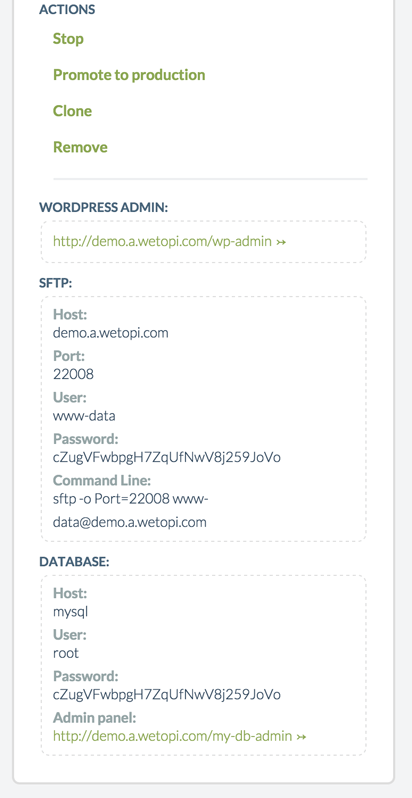
At wetopi, we use secure SFTP, which is the same as ftp but the connection is secure and information travels encrypted. If you are running a wetopi server, you’ll find the SFTP credentials in the Options menu → Advanced section of your Wetopi WordPress server:
Edit wp-config.php
This capture of an SFTP client shows the wp-config.php file inside the html dir:
Once opened with our editor we have to locate the bit that says:
/* That's all, stop editing! Happy blogging. */And above the line shown above, add the following lines shown below:
/** Multisite */
define('WP_ALLOW_MULTISITE', true);
Done!.
Once saved, Go back to your WordPress to enable the Network.
3 Network Setup
If we refresh our admin page, we should now find Network Setup under the Tools menu: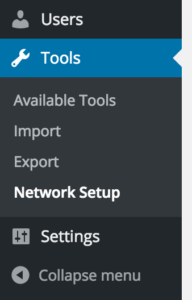
In this new Network Setup section, we decide if we want to install Multisite to work with Subdomains or Subdirectories. In our case, we check the Subdomains option, and optionally we can name our network websites as well. Then, click on the Install button.
4 Enable the WordPress Network
Once clicked the “Install” button, WordPress will generate some configuration lines to add in wp-config.php and .htaccess.
Wait! Wetopi server runs Nginx! we don’t have .htaccess!
Don’t worry we will pretty much ignore the .htaccess step 2. Wetopi Nginx server is ready to work with WordPress Multisite so we do not have to play with server configurations 🙂
NOTE: when WordPress installs the Multisite, it will do some validations and probably return an error about a missing “wildcard domains”:
To use a subdomain configuration, you must have a wildcard entry in your DNS. This usually means adding a “*” hostname record pointing at your web server in your DNS configuration tool.
We don’t have to forget to set up our DNS wildcard. Just in case, here we can learn a little bit more about Wildcard DNS records
Let’s go back to our wp-config.php, and add the prompted lines shown in step 1:
define('MULTISITE', true);
define('SUBDOMAIN_INSTALL', true);
define('DOMAIN_CURRENT_SITE', 'sitamet.com');
define('PATH_CURRENT_SITE', '/');
define('SITE_ID_CURRENT_SITE', 1);
define('BLOG_ID_CURRENT_SITE', 1);
This is what we ended up having in our wp-config.php:
/** Multisite */
define('WP_ALLOW_MULTISITE', true);
define('MULTISITE', true);
define('SUBDOMAIN_INSTALL', true);
define('DOMAIN_CURRENT_SITE', 'sitamet.com');
define('PATH_CURRENT_SITE', '/');
define('SITE_ID_CURRENT_SITE', 1);
define('BLOG_ID_CURRENT_SITE', 1);
/* That's all, stop editing! Happy blogging. */
Once, changes in our wp-config.php are saved our network is enabled and configured. We only have to log in again.
In our WordPress Dashboard, we should see our new “My sites” section.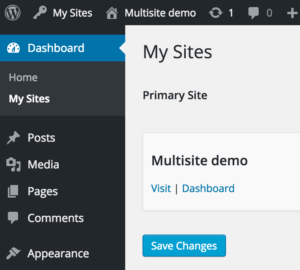
Now, the WordPress Multisite with subdomains feature has been fully enabled and configured.
Go to the dashboard and create your sites.
Don’t you have an account on Wetopi?
Free full performance servers for your development and test.
No credit card required.