Goal: Learn how you can launch a WordPress site in 20 seconds in wetopi.
Resources: 5 minutes of your time + 1 wetopi server. (sign up and get your free development server)
TL;DR Watch the 20 seconds video
Watch this 30 seconds video showing in real time on how you can easily create a WordPress site:
Creating a WordPress site.
At Wetopi, all WordPress projects by organized by sites. To launch a WordPress site, the first thing you have to do is to add a site to your account.
- Click to open the wetopi panel
If this is your First Time, you’ll see the welcome page, to create your first WordPress site Click on the “New site” block:

Fill in the details in the following window that you see as per below

It’s recommended to assign a short descriptive name, i.e. your domain name without extensions. Therefore, Wetopi will assign you a temporary subdomain based on it, e.g., demo.a.wetopi.com
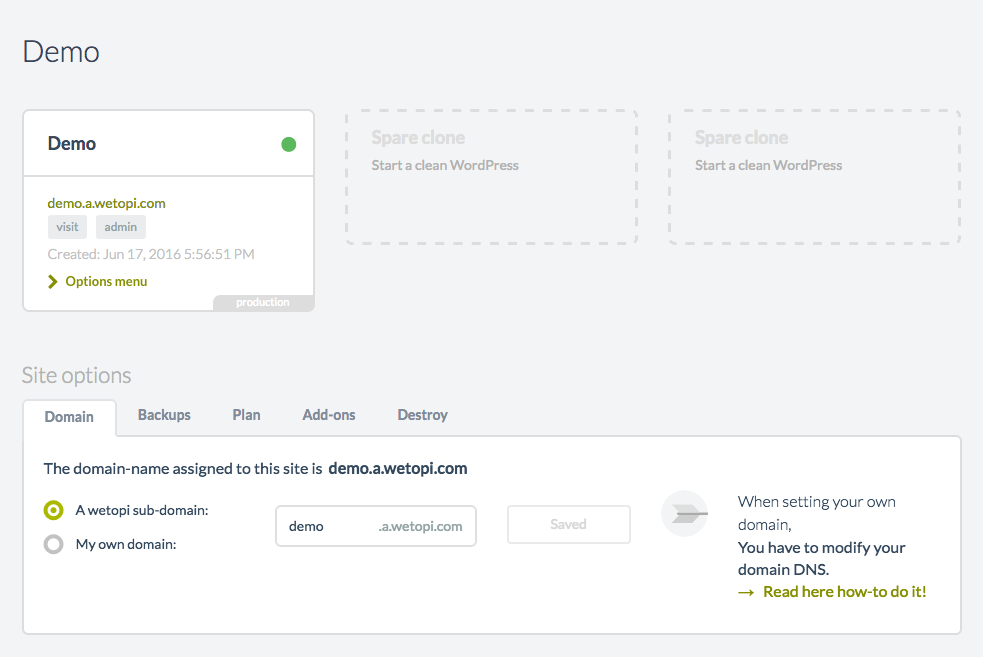
Once you click the button “Add new site”, Wetopi will show you the site’s workspace: (and all this just takes 20 seconds!)

Each site has a minimum of 3 framed boxes. The first box is “Demo”, your newly minted WordPress site , and the remaining 2 with grey dashed lines are labeled as “Spare server”. This boxes are called clones.
A clone is dedicated finely tuned container-server which has the same resources as the Primary server.
You can create a clone to run a duplicate copy of your WordPress site for testing and debugging or to launch another WordPress site.
You have now successfully launched your first WordPress site, Assign a domain name to it and start development immediately.
Visiting our WordPress site
By clicking the button “visit”, we’ll jump to our new WordPress site.
Managing your WordPress site
Thanks to SSO “Single Sign On”, you can recycle the secure wetopi session. This is a good thing. Not just because with a simple click we can jump straight to our WordPress admin, but because we are not exposing our WordPress credentials across the network. This is something to take in consideration, specially nowadays we work remote and connect to Unsecured Wifi Hotspots.
How to destroy your WordPress server
Wetopi is a pay-per-use platform, so after playing with your demo, you can save credit by stopping or destroying your server.
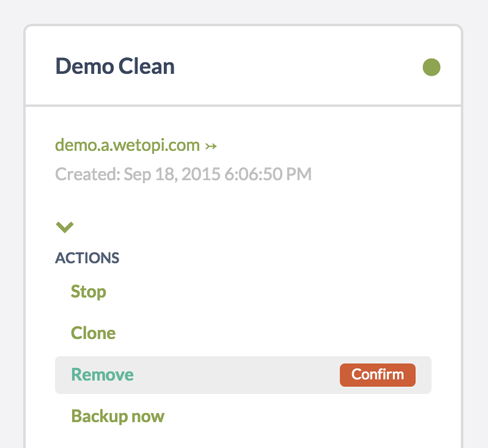
At the bottom of each server, you will find the link “>” that opens the options menu:

You just have to click the “Delete” and confirm.
The “Backup now” button will allow you to keep a backup and the ability to restore your server later without wasting server resources.
Don’t you have an account on Wetopi?
Free full performance servers for your development and test.
No credit card required.