Migrate Guru is a free WordPress migration plugin. It simplifies website migration by moving your site in a way that requires minimal technical knowledge.
Table of Contents
- Why Migrate Guru?
- 1 Create your wetopi destination website.
- 2 Install Migrate Guru in your origin website.
- 3 Complete the migration form.
- 4 Migrate.
Why Migrate Guru?
This migration plugin is fast, efficient and works with sites as large as 200 GB. It uses a simple 1-step process that runs on BlogVault servers. This way, it doesn’t overload your live (source) website.
These are the steps you’ll need to take to migrate your WordPress website to Wetopi using this migration plugin:
1 Create your wetopi destination website.
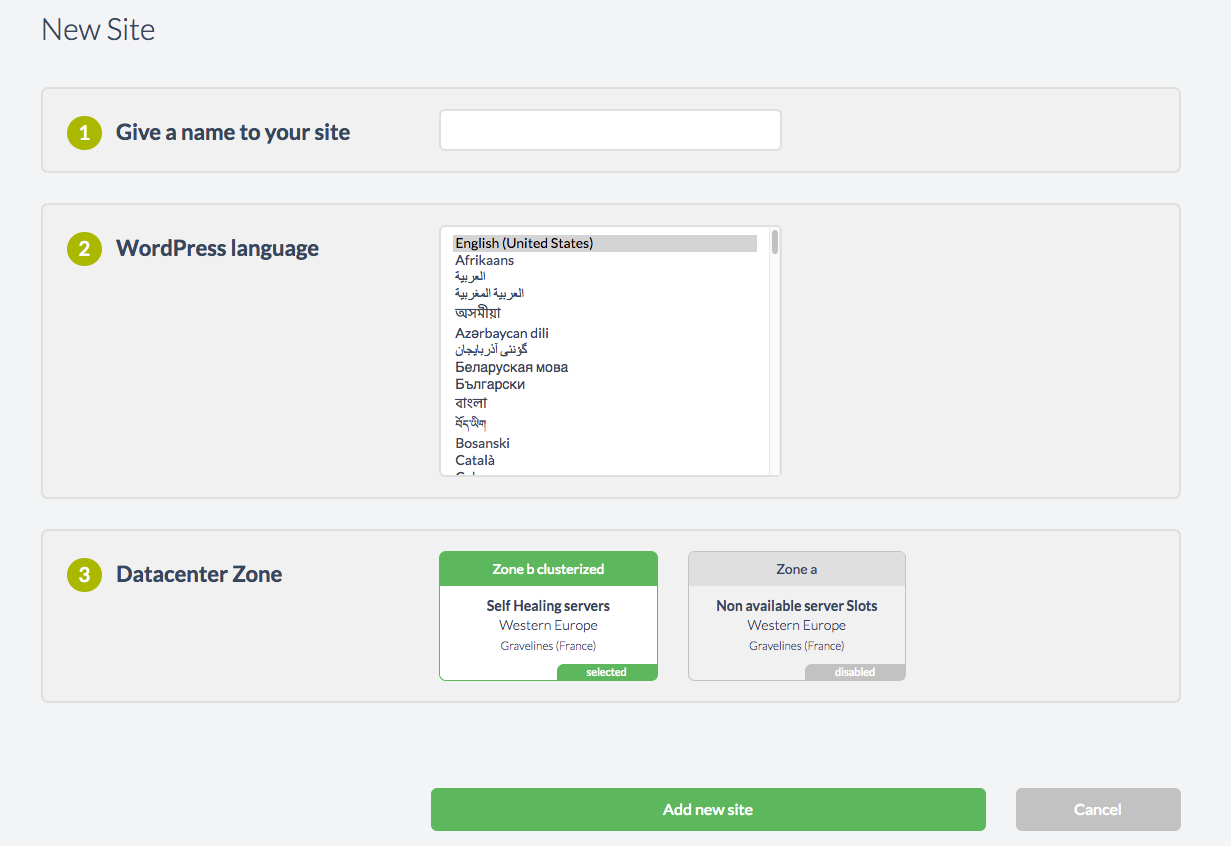
Login to your Wetopi account: https://app.wetopi.com then in “My sites” main page, click on the “New site” block to create a new site, and fill in the details in the following window that you see as per below.
Once you click the button “Add new site”, Wetopi will show you the site’s workspace:
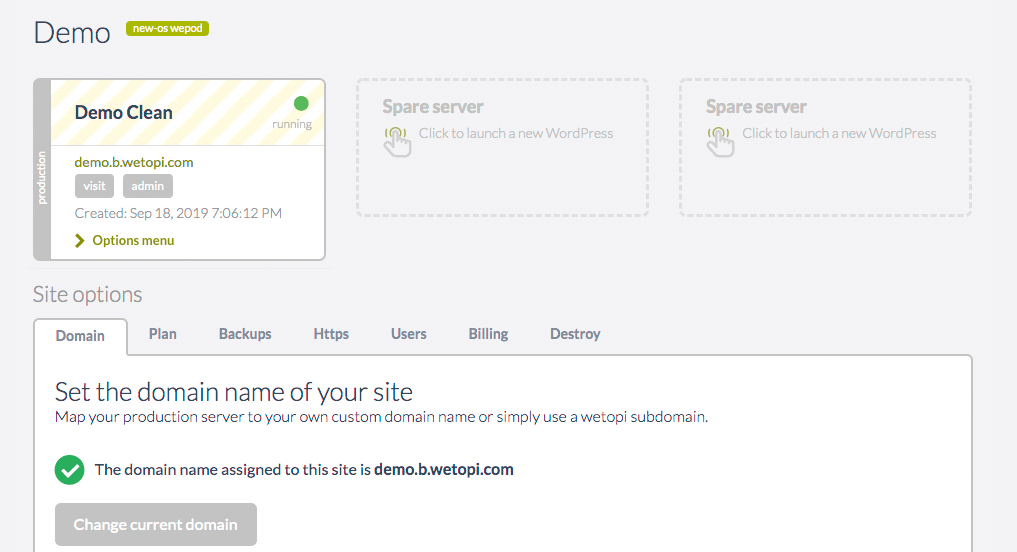
Now you have a destination server running a clean WordPress site under a wetopi.com subdomain.
IMPORTANT: verify your new WordPress website server doesn’t have the “Restrict access ON“.
This access-protection wouldn’t allow Migrate Guru to browse your site from the “Outside World”.
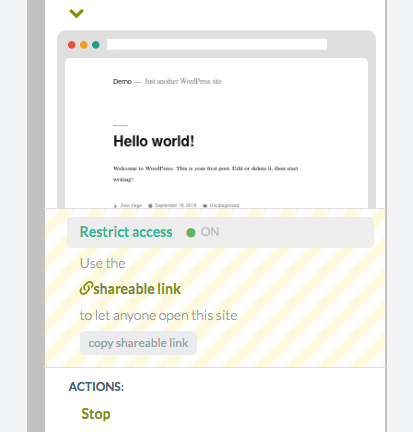
Click the “Restrict access ON” button to switch it OFF and give access to your WordPress site.
2 Install Migrate Guru in your origin website.
Log into your existing website and navigate to Plugins → Add New and then search for Migrate Guru:
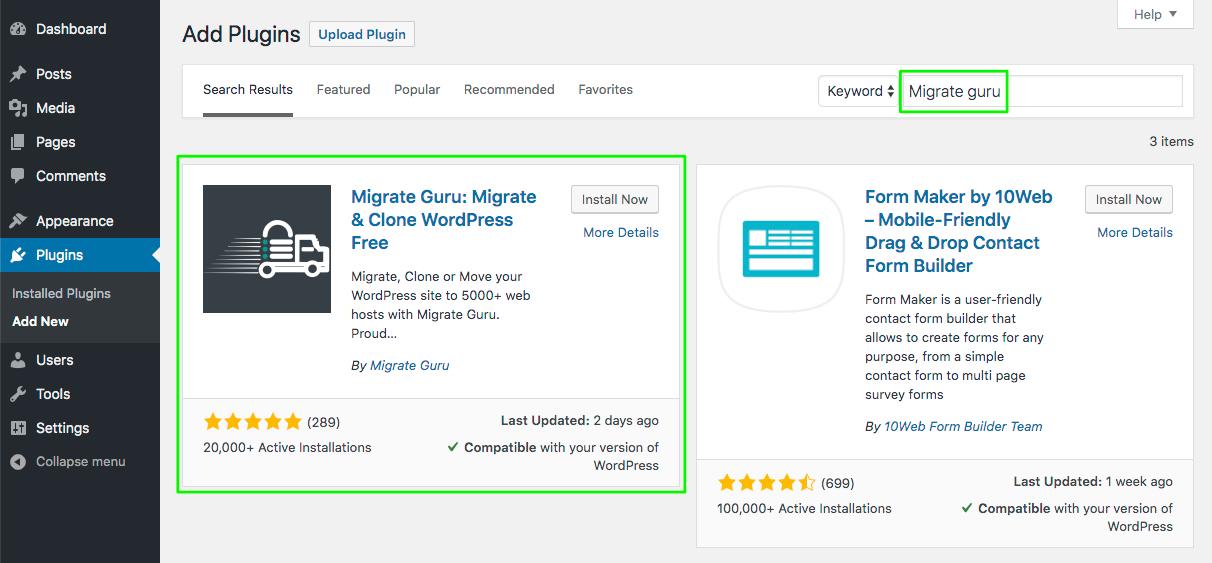
After the install, activate the plugin.
3 Complete the migration form.
Jump to the WordPress migration form. You can find this form by clicking on Migrate Guru in the WordPress admin menu.
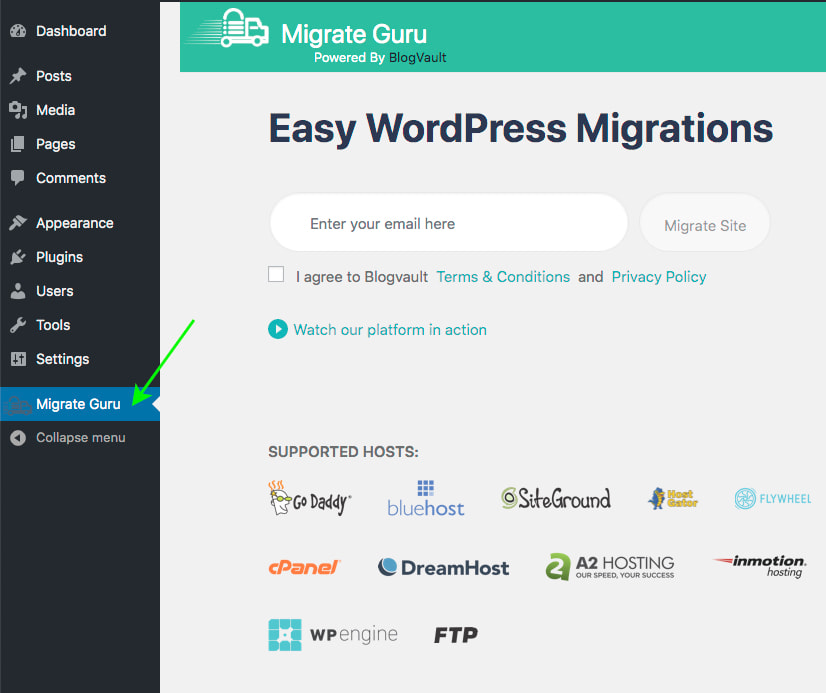
Enter your email address, agree to the Blogvault Terms of Service and Privacy Policy, and then click Migrate Site
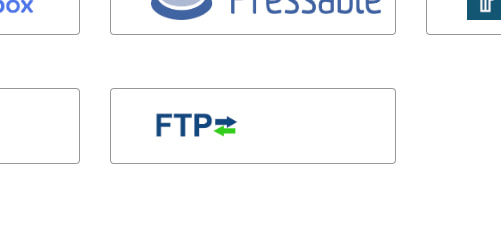
From the following menu, scroll to the bottom and select the FTP option:
4 Migrate.
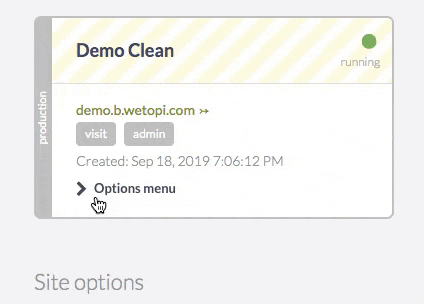
Next, go back to your wetopi panel and gather the SFTP details for the WordPress site server you just created.
Open your site server page, then → Options menu → Advanced
With your wetopi SFTP credentials, jump to the origin and fill the Migrate Guru form.
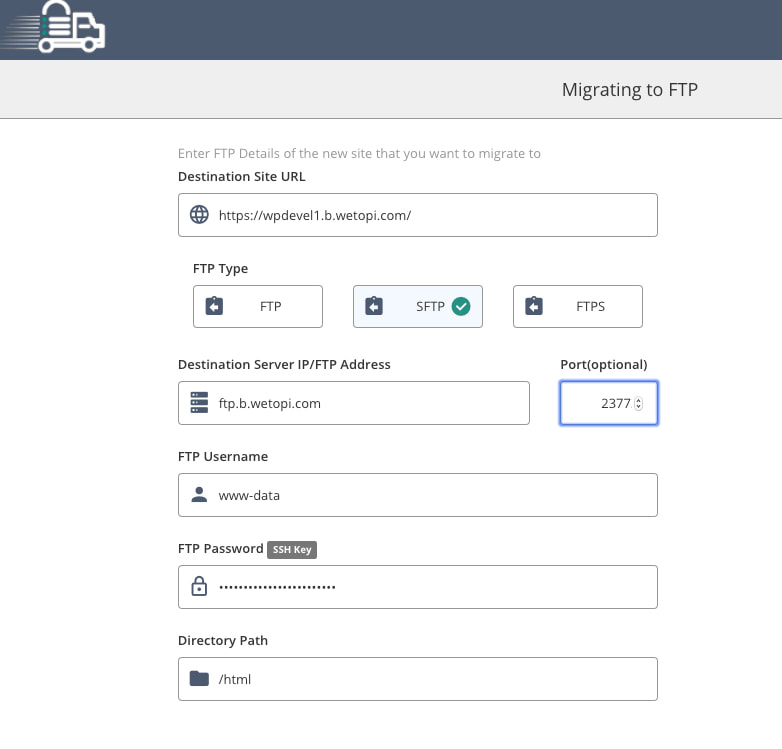
Important details:
Destination Site URL: You need to include the protocol of your wetopi site, whether it is https:// (default) or http://. Plus the ending slash
FTP Type: Be sure to select SFTP rather than FTP as the FTP Type.
Port: Every wetopi WordPress website has its own unique SFTP port.
Directory Path: with wetopi, your path is always /html
Once you’ve entered the details scroll to the bottom and click Migrate.
Migrate Guru will now test the SFTP credentials you provided. If any problems are encountered Mi will return to the SFTP form screen and highlight the fields that need to be reviewed. Check the details, correct any mistakes, and click Migrate again.
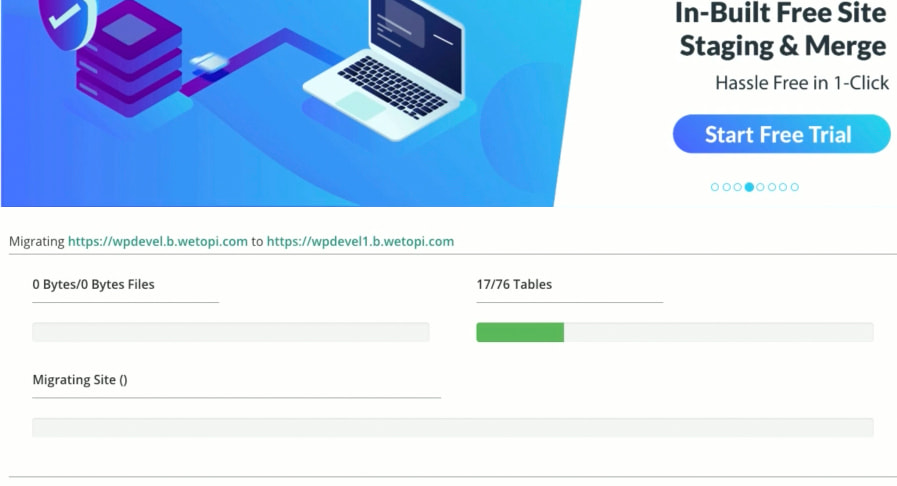
Migrate Guru will let you know as soon as the migration is complete.
You may also enjoy How to change the domain name of your site.
We are techies passionate about WordPress. With wetopi, a Managed WordPress Hosting, we want to minimize the friction that every professional faces when working and hosting WordPress projects.
Not a wetopi user?
Free full performance servers for your development and test.
No credit card required.