If you’re managing a site on Wetopi, whether it’s through a paid subscription or using a Free Development server, this guide will walk you through the steps to assign your own domain name to your site.
Link your Domain Name to your WordPress site in 5 steps
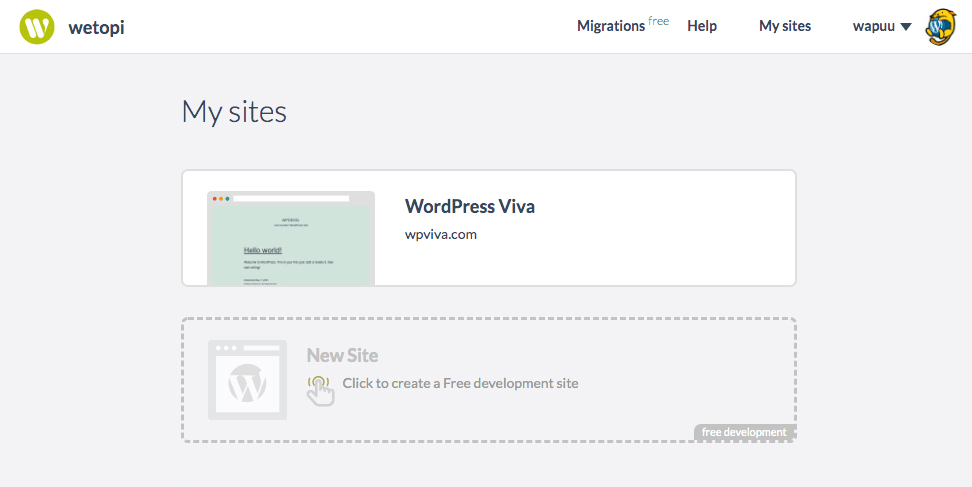
Let’s say you have developed a WordPress site with your free wetopi development server using one of our temporary subdomains e.g., http://wp-viva.b.wetopi.com and now you want to publish it with your domain e.g., http://wpviva.com
Then, click over the site box to jump to the detail page.
2 Add your Domain and Redirections
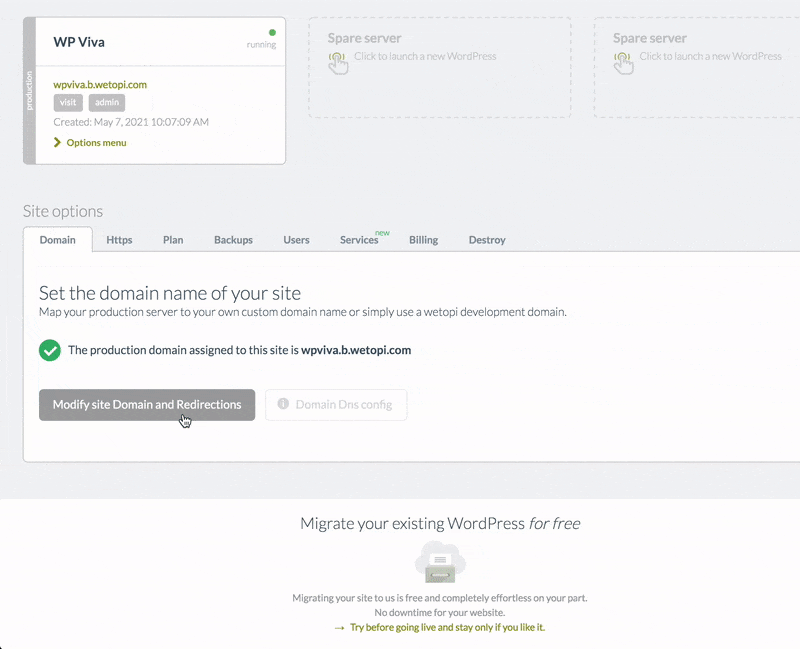
At the bottom of your site’s page, select the “Domain” tab.
Then click the “Modify site Domain and Redirections” button:
Click the Modify site Domain and Redirections
In this step by step, we will use our new domain: wpviva.com
In “Your own domain” the domain name you want to assign to your WordPress site. e.g. wpviva.com
In “Domain redirects” enter a space-separated list of alternate domains or subdomains. When one of this “Domain redirects” is accessed, the browser will jump to the production domain specified in the previous field: “Your own domain”. This is the perfect place for “old style” www subdomain, like www.wpviva.com
Optionally, you can fill in the “Domain alias” with domains or subdomains your WordPress will handle. This is typical for operating a WordPress multisite network or a multilingual site with different countries directed to various domains.
3 Update the DNS zones
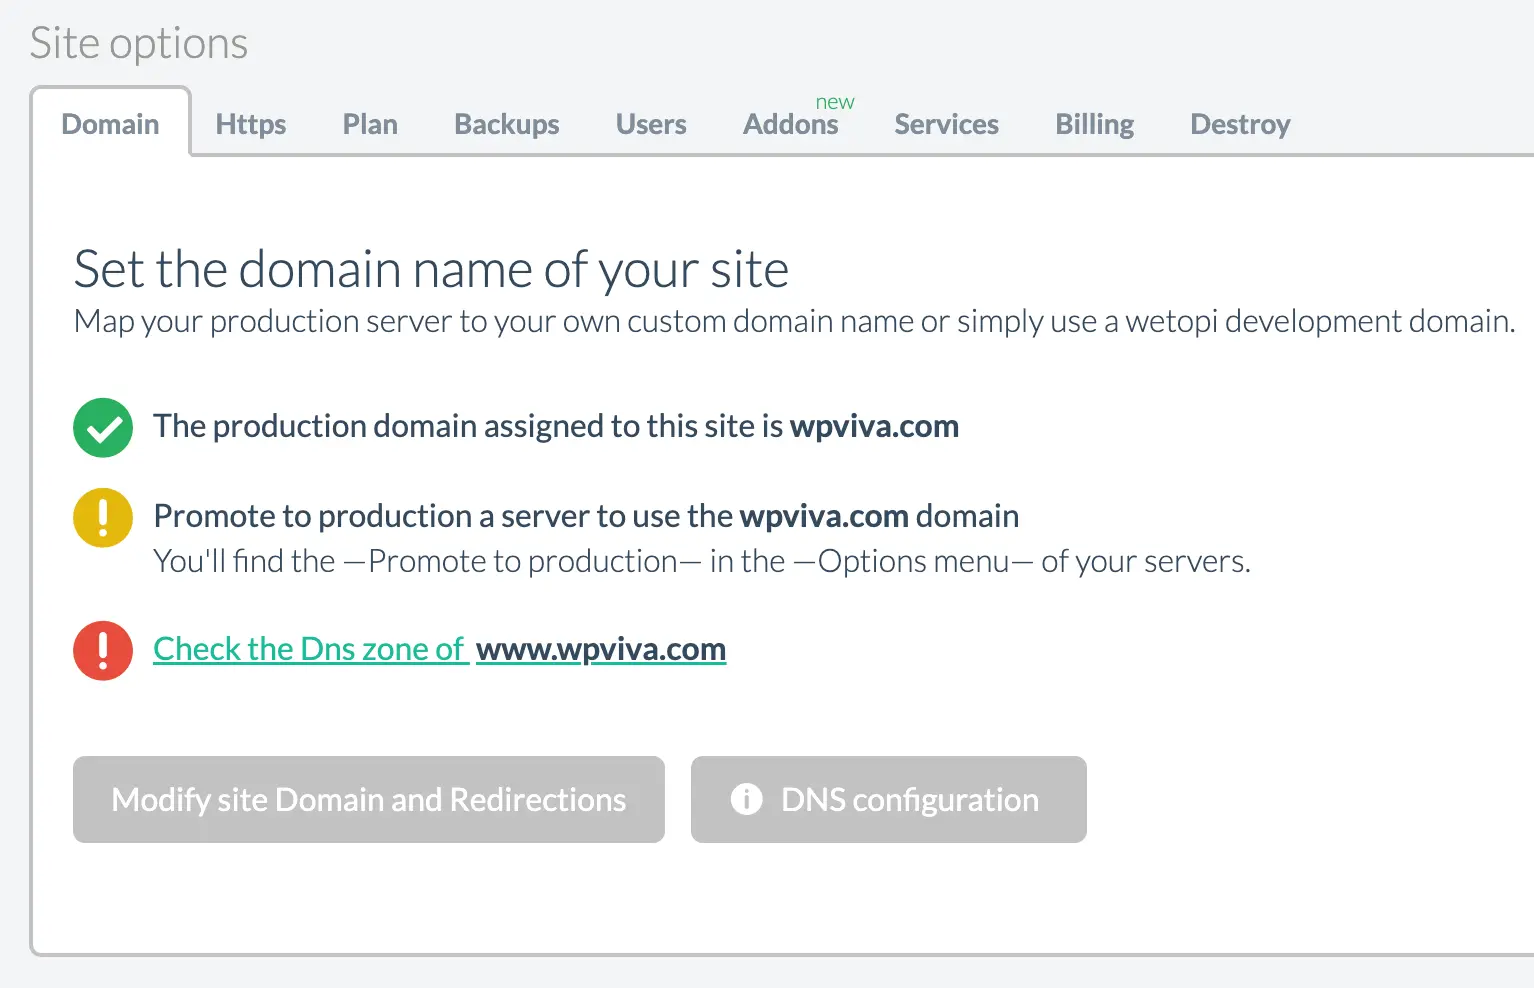
Once you Save the new domain, wetopi will alert you if your new domain DNS zones need to be updated:
Wetopi alerts when the domain Dns Zones do not point to your wetopi server
This step must be done in your DNS provider. To help you in the process, Wetopi provides a detailed informative page in “Domain Dns config”
Click the “Domain Dns config” button you’ll find at the botton, to open the DNS configuration page:
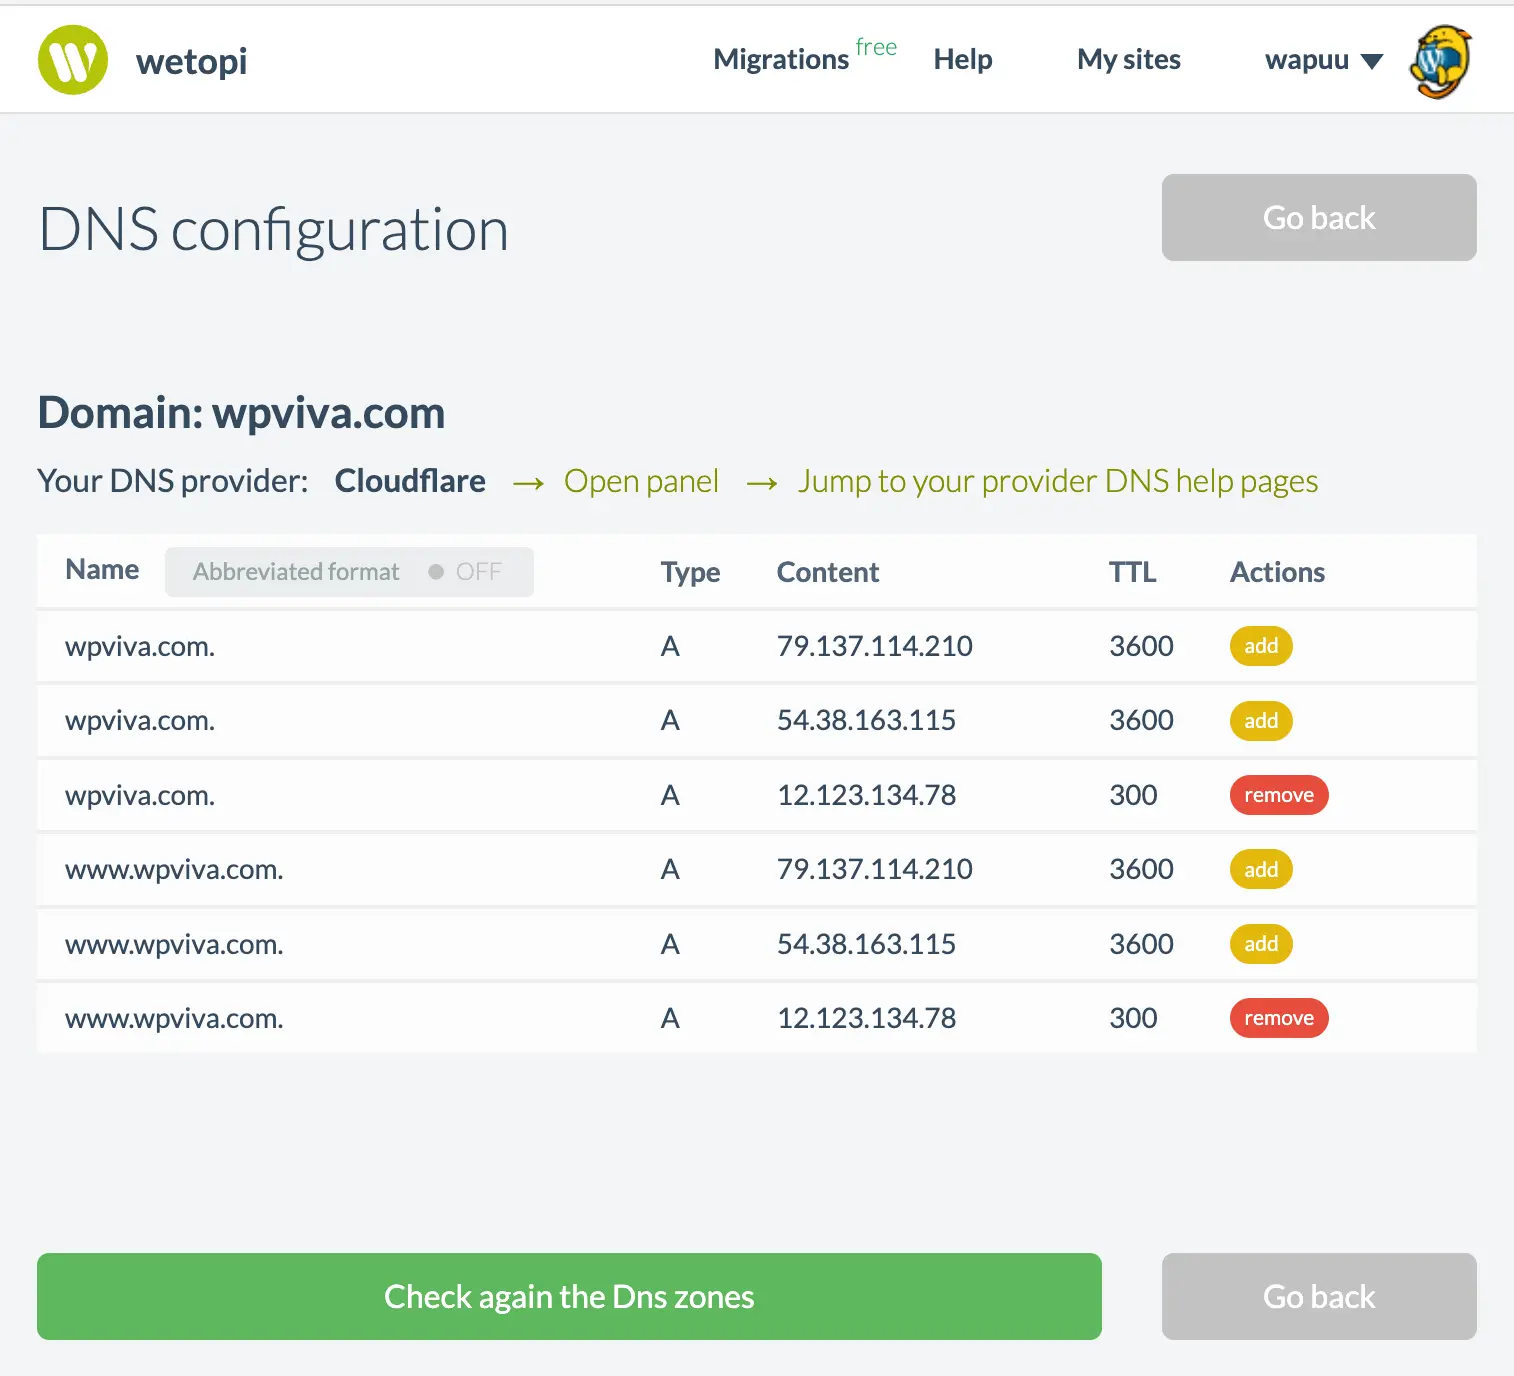
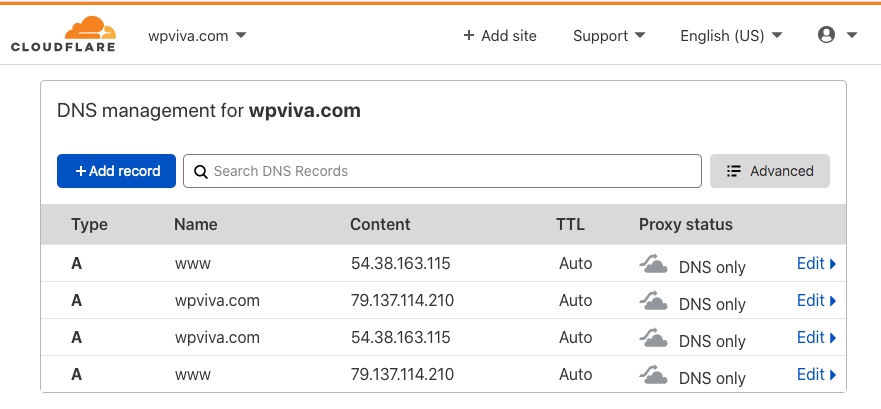
The DNS configuration page at Wetopi, is an informative page. Your DNS Zones are managed by your Name Server provider.
In this example, according to Wetopi info page, the domain wpviva.com uses Cloudflare for its Name Server (NS). Wetopi also provides a link to the control panel and help pages.
At Wetopi, specialists in WordPress hosting, we do not offer domain registration or Domain Name Server services.
It’s recommended to preserve your Domain registration and Domain Name Servers in an independent provider well recognized and member of the ICANN
3.1 login into our Name Server provider
To set up the DNS Zones, you should sign in to your Name Server provider’s platform, which is typically the same interface where you registered your domain.
In our case our Registrar is different than our DNS provider. We have Cloudflare, and this is how it looks like when going to its DNS zones manager:
3.2 Update the DNS Zones
Important: Don’t change the Name Servers (NS) of your domain.
NS1, NS2 are not DNS Zones!
NS are the IP addresses of databases in charge of your domain’s information. To make Zone adjustments, go to the DNS Zones manager panel provided by your current Name Servers (NS).
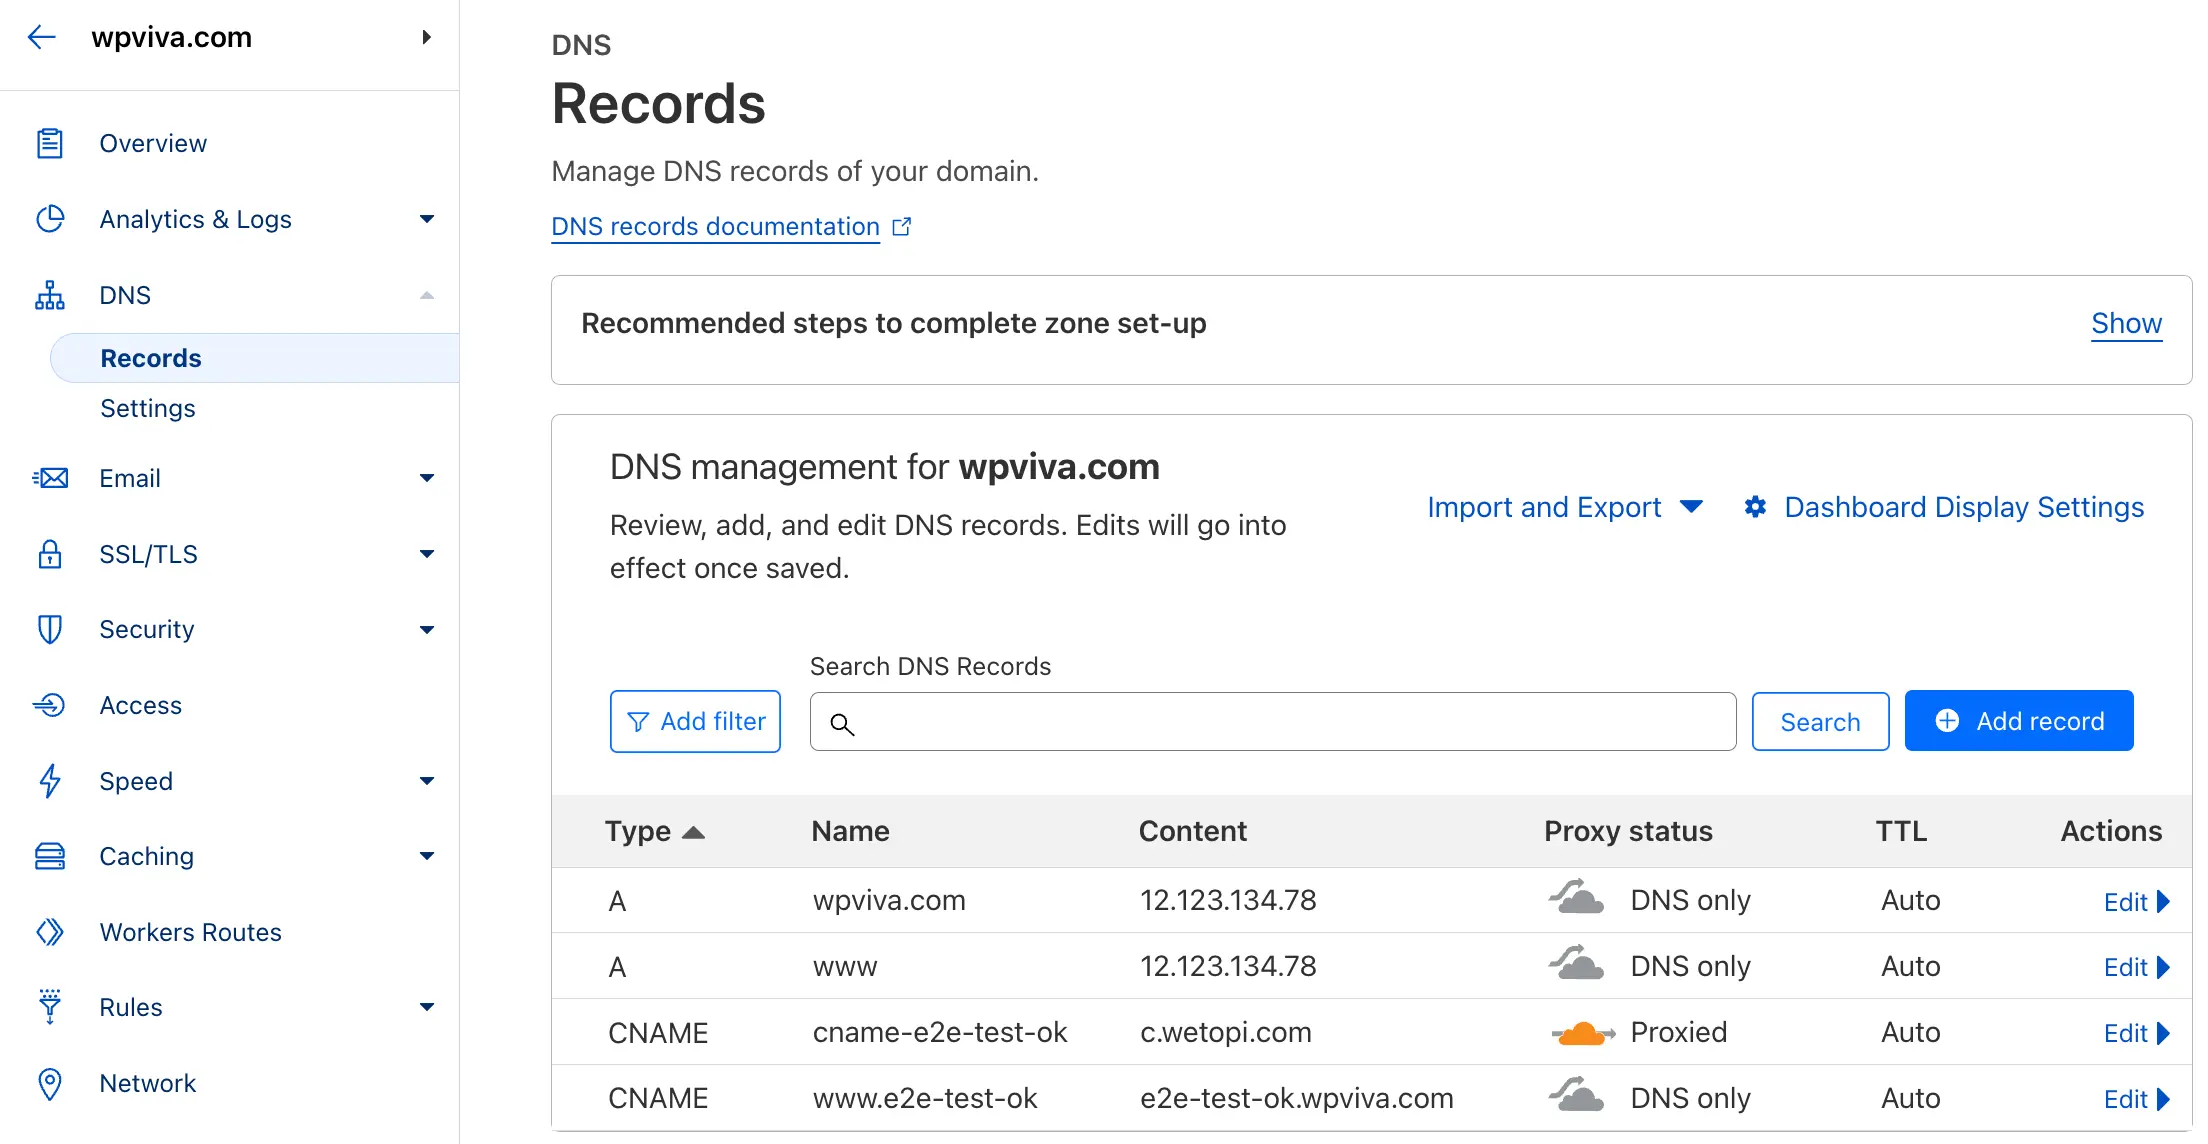
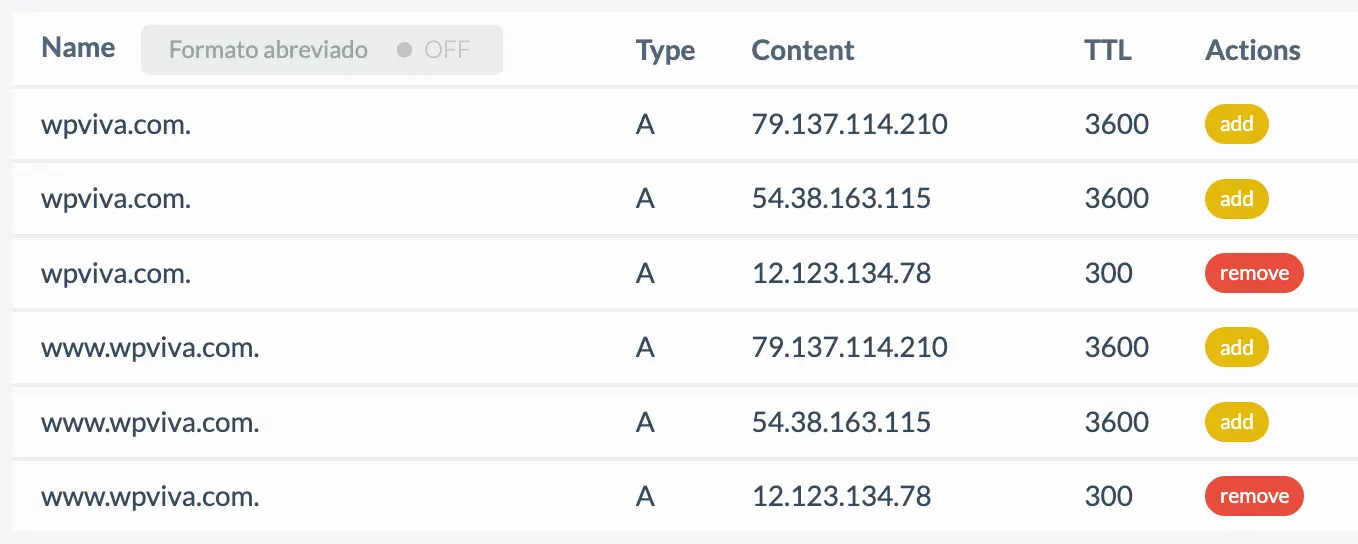
Once we are in our DNS Zones Manager, your have to follow the Actions Wetopi describes in its info page:
Add the entries marked in yellow in the Actions column (pleae note the 2 different IP for Wetopi. Make sure you include both!)
Remove the records highlighted in red.
You may opt to edit existing records instead of adding new ones.
Do not alter other services like email. Ensure you only modify the entries with the exact “Type” and “Content” described.
Wetopi has double records: 2 IP addresses per domain and subdomain.
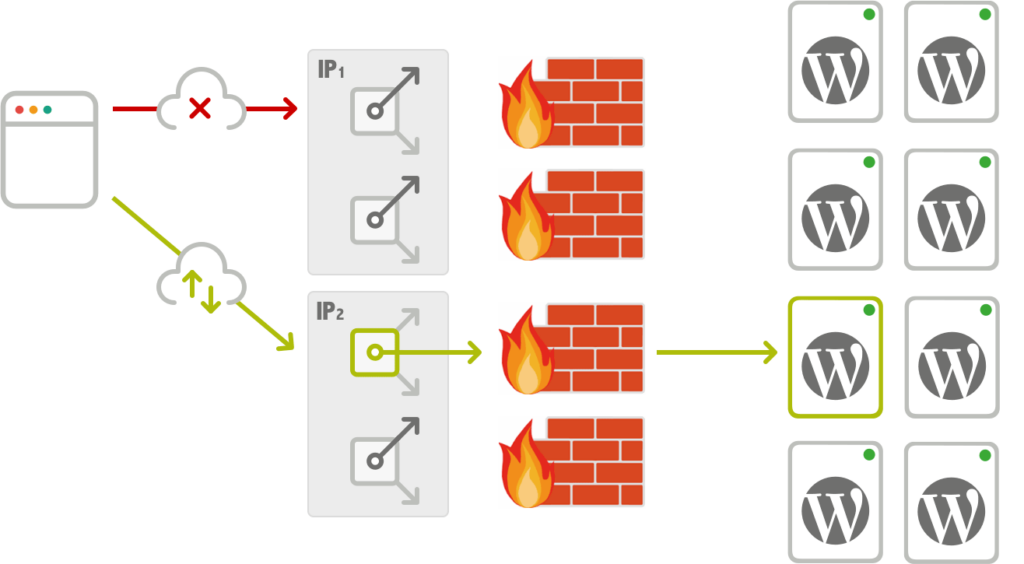
With Wetopi you get Redundant Web Application Firewalls on a Redundant IP network.
After adding the new records and removing the old ones, our DNS Zones are ready to propagate:
3.3 Wait for the propagation of DNS changes
Important: when you update a DNS Record/Zone, it takes time for the changes to take effect. Your DNS server has a default refresh of minutes or hours, but due to various factors, it can take more time to propagate.
Click the “Check again the Dns record propagation”, to check the evolution of your DNS Records changes.
Wetopi DNS Coinfiguration info panel with all DNS zones defined and propagated.
Updating your domain zones doesn’t instantly inform the entire Internet of this change. It can take up to 48 hours for all servers worldwide to recognize the new address.
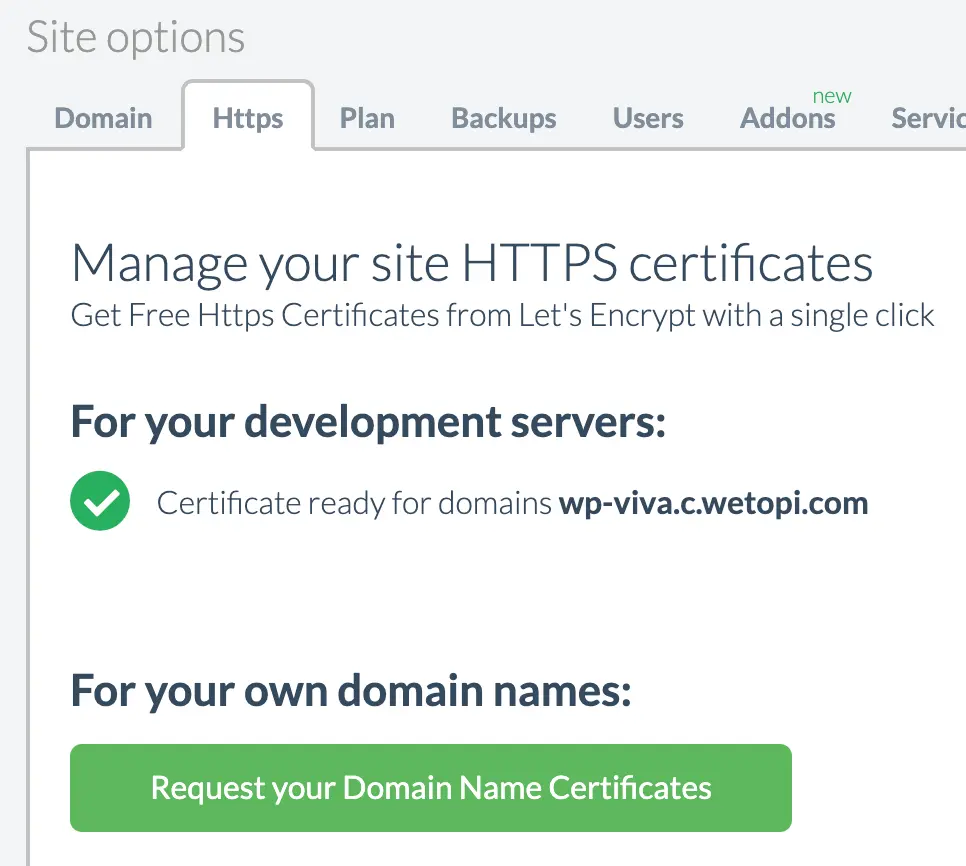
Today, using HTTPS is essential for securing your site’s communications.
Wetopi offers an integrated SSL HTTPS Certificate setup. Our users can get a free, trusted certificate from Let’s Encrypt with just a couple of clicks.
Navigate to the “HTTPS” tab and,
Click the button “Get a Free HTTPS Certificate”. The process takes only a few seconds.
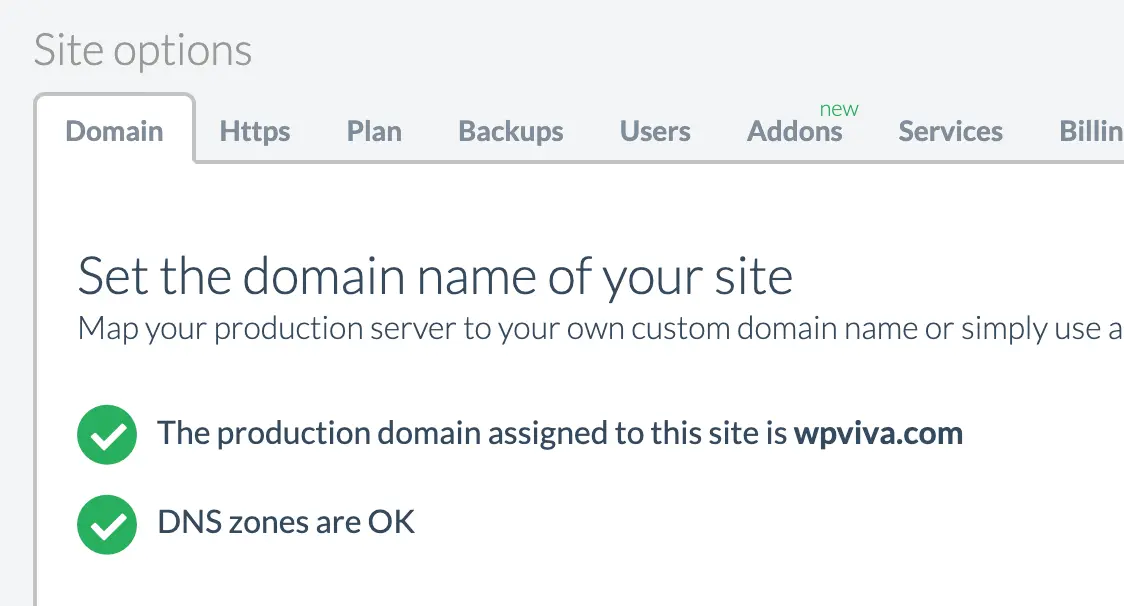
Once your domain is propagated, wetopi show you all green:
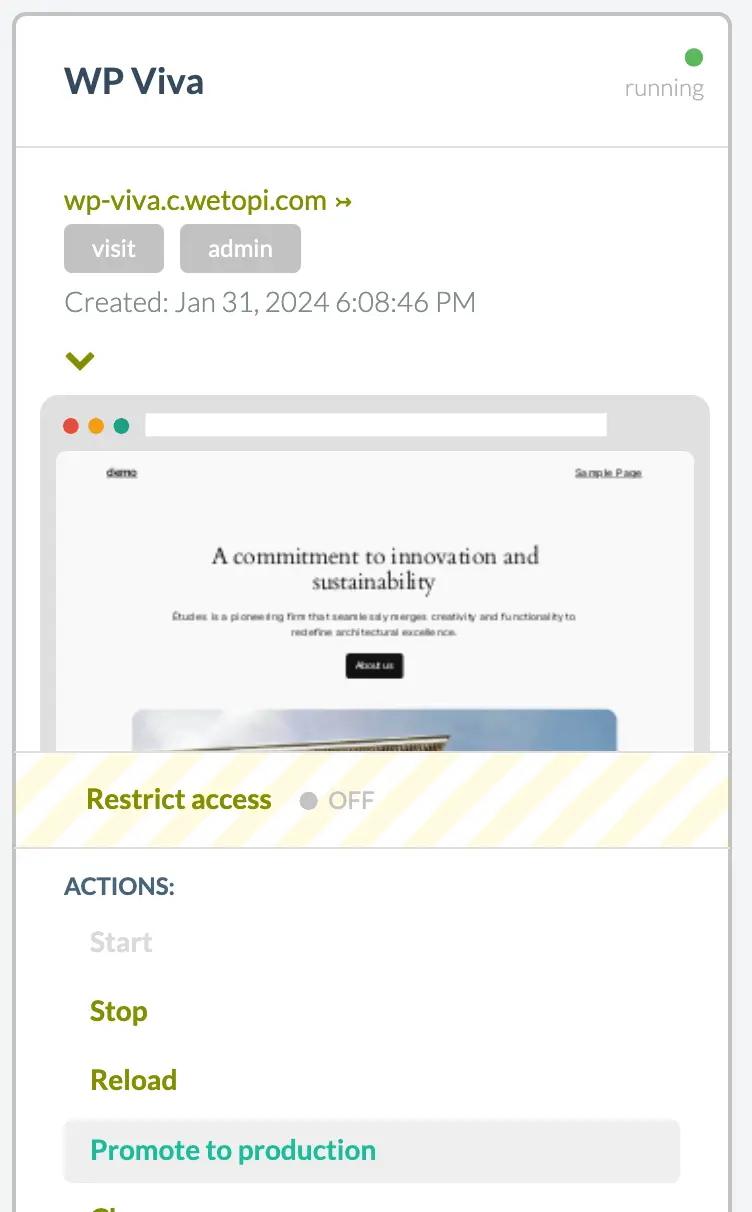
By default, wetopi will try to “Promote” your WordPress server to use your new “Production” domain. If nothing happens, open the “Options menu”, and click the “Promote to production” button:
Promote to production button will change the Domain Name of my WordPress site.
IMPORTANT: There is no need to touch your Web Server config, wp-config.php file, or update wp-options records in your database.
When you click on “Promote to production” wetopi will do all these tasks for you.
During this action, wetopi will configure the WordPress site with the new domain, and then it will rewrite the URLs of all posts, media, links, etc. affected by this domain change.
This action will take a few seconds (something between 15 and 60 seconds, depending on your website size).
One last detail!
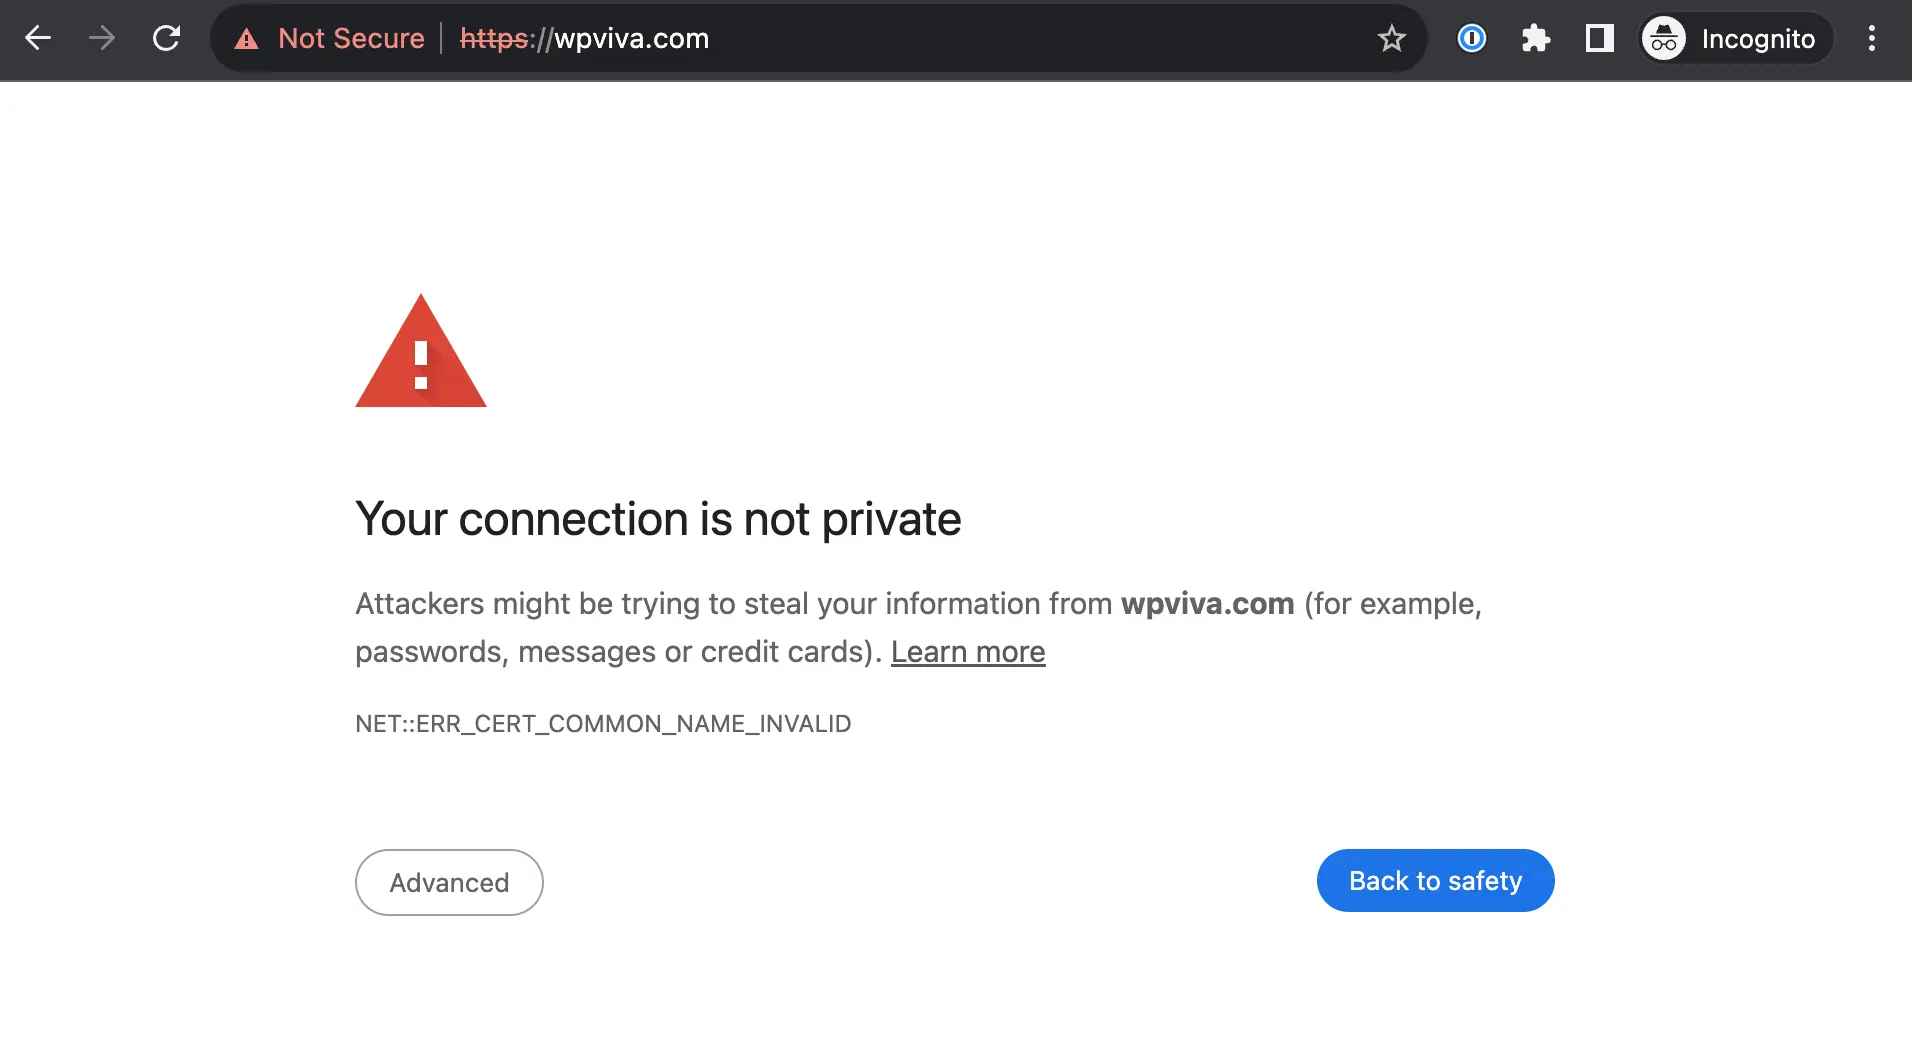
Sometimes the Https Let’s Encrypt TLS certificate request fails, and your browser returns an error:
Your connection is not private
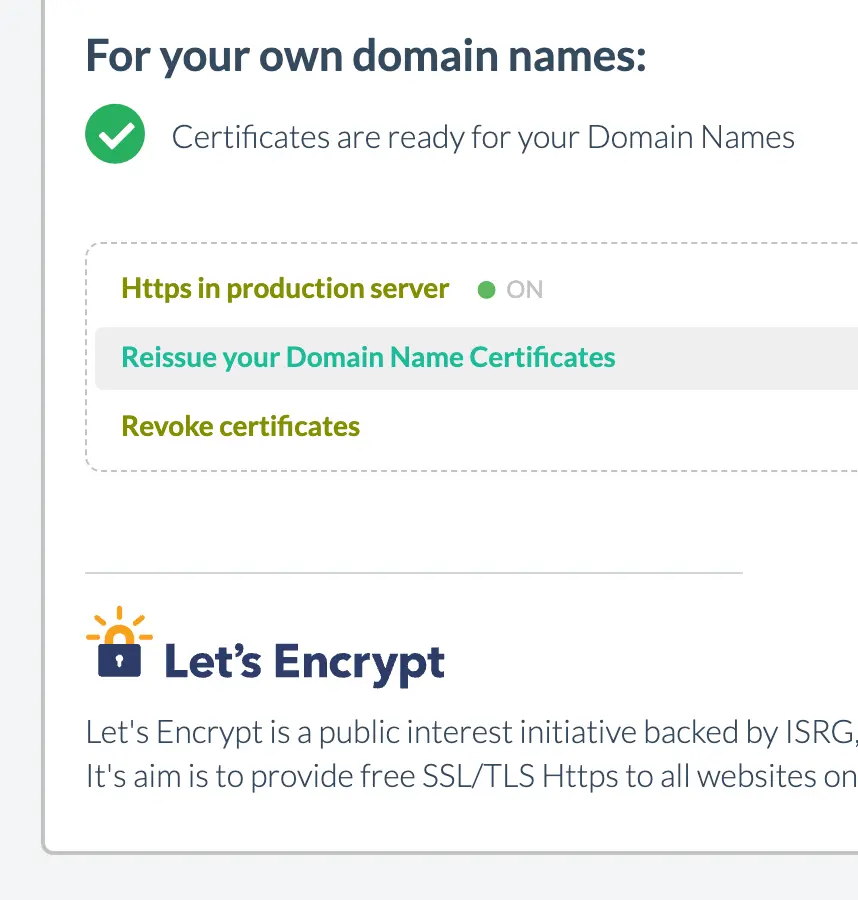
IMPORTANT: If browsing your new domain, you encounter a “Your connection is not private” warning (including in incognito mode).
Fixing the error Your connection is not private
Ensure your SSL Certificate are emitted. Press the “Reissue your Domain Name Certificates” button:
Force the inmediate activation of your HTTPS certificate with a server restart: “Stop” your server and then “Start” it again.
We are techies passionate about WordPress. With wetopi, a Managed WordPress Hosting, we want to minimize the friction that every professional faces when working and hosting WordPress projects.